When was the last time you cleaned the rubber seal around your refrigerator door?
Most people regularly wipe refrigerator shelves, drawers, and handles, but the door gasket is easy to overlook. Hidden inside its folds, the gasket can collect crumbs, grease, spills, dust, moisture, and other residue.
Over time, that buildup can create an unpleasant smell and provide a place where mold and other microorganisms can grow.
The good news is that cleaning a refrigerator gasket doesn't require expensive products or hours of scrubbing. With a few basic household supplies and a little patience, you can usually get the seal looking much cleaner.
Here's a simple method to try.
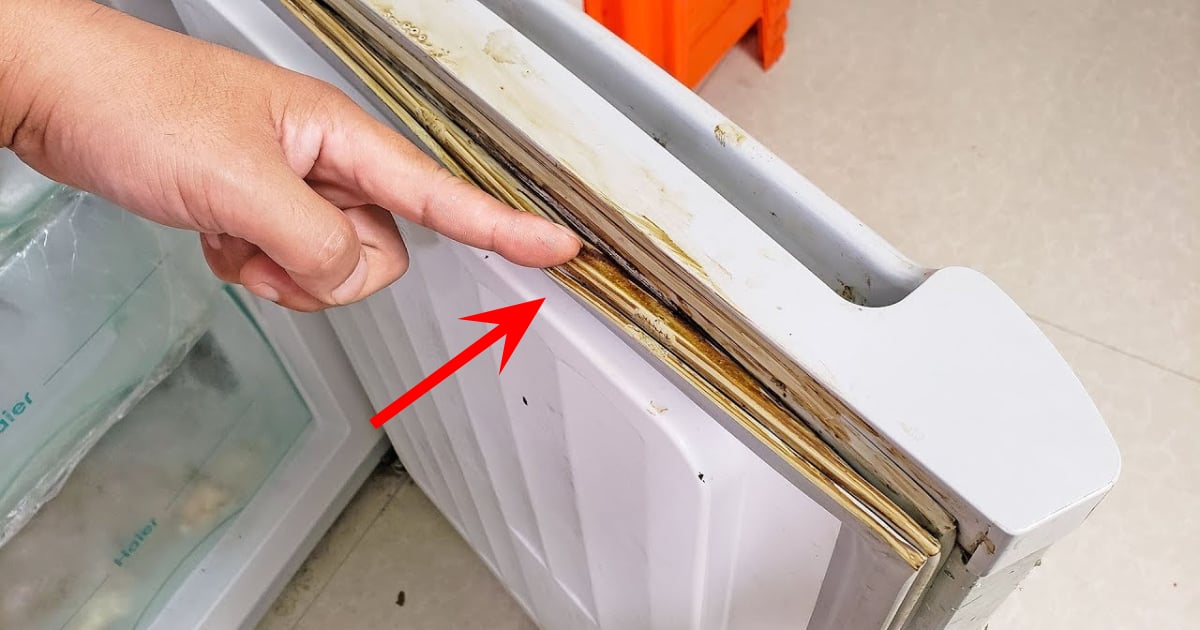
What Is a Refrigerator Gasket?
The gasket is the flexible rubber or rubber-like seal that runs around the refrigerator and freezer doors.
Its main job is simple but important:
It helps create an airtight seal when the door is closed.
A properly functioning gasket helps keep cold air inside while limiting warm air from entering.
If the gasket becomes dirty, damaged, warped, or loose, the refrigerator door may not seal properly.
That can contribute to:
-
Temperature fluctuations
-
Increased energy use
-
Excess condensation
-
Frost buildup in some freezers
-
Food-storage problems
That's why cleaning and inspecting the gasket is more than just a cosmetic chore.
Why Does the Fridge Gasket Get So Dirty?
The gasket sits in a location where spills and food particles can easily collect.
Common sources of grime include:
-
Milk or juice spills
-
Food crumbs
-
Sauce
-
Grease
-
Dust
-
Moisture
-
Sticky residues
-
Mold or mildew growth
The folds of the gasket are particularly easy to miss.
You may wipe the visible surface and assume the seal is clean, while dirt remains hidden deep inside the grooves.
What You'll Need
You don't need a complicated cleaning kit.
Gather:
-
Warm water
-
Mild dish soap
-
A soft cloth or microfiber cloth
-
An old soft toothbrush
-
A dry towel
For stubborn residue, you may need a little more patience rather than a stronger chemical.
Avoid abrasive scrubbers that could damage the gasket.
Step 1: Empty the Area Around the Door
Before cleaning, move anything that might get in the way.
You don't necessarily need to empty the entire refrigerator.
Simply make sure you can open the door fully and reach all parts of the gasket.
If you're cleaning around shelves or drawers at the same time, remove them according to the refrigerator manufacturer's instructions.
Step 2: Inspect the Gasket Carefully
Before applying any cleaner, look closely at the seal.
Pull the folds outward gently and check for:
-
Crumbs
-
Sticky residue
-
Black spots
-
Mold-like growth
-
Cracks
-
Tears
-
Loose sections
-
Deformation
Don't pull aggressively.
The gasket is flexible, but forcing it can damage the seal or detach it from its mounting.
Step 3: Remove Loose Dirt First
Use a dry cloth to wipe away loose crumbs and dust.
This makes the next step easier.
If you immediately add water to a layer of crumbs and food residue, you may simply turn the dirt into a sticky paste.
A quick dry wipe first can save time.
Step 4: Make a Mild Cleaning Solution
Add a small amount of mild dish soap to warm water.
You don't need a highly concentrated mixture.
A gentle solution is usually sufficient for ordinary grease and food residue.
Dip a soft cloth into the solution and wring it out so that it is damp rather than dripping wet.
Step 5: Wipe the Entire Gasket
Start at the top of the refrigerator door and work your way around.
Pay particular attention to the folds.
Gently pull the flexible edge outward and wipe inside the groove.
Don't forget:
-
Top edge
-
Bottom edge
-
Hinged side
-
Handle side
-
Inner folds
This is where much of the hidden grime can accumulate.
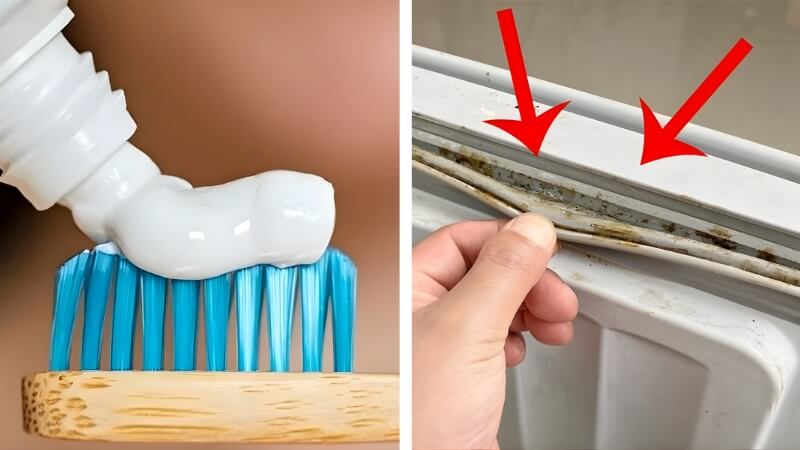
Step 6: Use a Soft Toothbrush for Tight Areas
Some parts of the gasket have narrow grooves that a cloth can't reach easily.
An old, clean, soft-bristled toothbrush can be useful.
Dip the brush into the mild cleaning solution and gently scrub the affected area.
Don't use excessive force.
The goal is to loosen grime, not aggressively scrape the rubber.
Step 7: Wipe Away Soap Residue
After cleaning, use a separate damp cloth with clean water to wipe away remaining soap.
This step matters because leaving cleaning-product residue behind can attract more dirt.
You don't need to soak the gasket.
A lightly damp cloth is enough.
Step 8: Dry the Gasket Thoroughly
Use a clean, dry towel to remove moisture.
Pay particular attention to the folds.
Moisture trapped inside the gasket can contribute to unpleasant odors and microbial growth.
Leaving the seal dry also helps you inspect it more clearly.
What If You Find Black Spots?
Black or dark spots may indicate mold or mildew, but appearance alone isn't enough to identify exactly what you're seeing.
If you find a small amount of surface growth, clean the area thoroughly using a product appropriate for the refrigerator manufacturer's recommendations.
For stubborn or extensive growth, check your appliance manual or contact the manufacturer for guidance.
If the gasket remains stained after cleaning, that doesn't necessarily mean it is still contaminated. Some stains can remain even after the underlying material has been cleaned.
Should You Use Bleach on the Gasket?
Be cautious.
Many people automatically reach for bleach when they see mold, but strong chemicals aren't always appropriate for rubber or flexible appliance seals.
Bleach can potentially damage certain materials, and improper use can create dangerous fumes.
If your refrigerator manufacturer doesn't specifically recommend bleach for the gasket, a safer starting point is usually a mild cleaning solution.
And remember:
Never mix bleach with vinegar, ammonia, or other cleaning chemicals.
What About Vinegar?
White vinegar is popular for household cleaning, but you shouldn't assume it's appropriate for every refrigerator gasket.
Some manufacturers may permit diluted vinegar, while others recommend specific cleaning products.
Because gasket materials vary, check the refrigerator's care instructions first.
If vinegar is approved for your appliance, use it appropriately diluted and rinse the surface afterward.
Can Baking Soda Help?
Baking soda can be useful for some household cleaning tasks because it is mildly abrasive and can help neutralize certain odors.
However, scrubbing aggressively with baking soda can potentially damage delicate surfaces.
If you use it, apply it gently and avoid treating the gasket like a hard countertop.
A mild soap-and-water solution is usually a good first choice for routine cleaning.
Don't Forget the Refrigerator Door
The gasket isn't the only place that collects grime.
While you're cleaning, inspect:
-
Door edges
-
Door shelves
-
Handles
-
Areas around hinges
-
The surface where the gasket contacts the refrigerator body
Food residue can accumulate in tiny spaces around the door.
Cleaning these areas helps keep the entire refrigerator exterior and sealing area in better condition.
Why a Clean Gasket Matters
A clean gasket can help the refrigerator door close properly.
When the seal is covered with sticky food residue or debris, the door may not sit correctly against the refrigerator frame.
A compromised seal can allow cold air to escape.
The refrigerator may then need to work harder to maintain its target temperature.
However, don't assume that every energy or cooling problem is caused by a dirty gasket.
Other possible causes include:
-
Faulty temperature controls
-
Dirty condenser components
-
Poor ventilation
-
Door problems
-
Aging components
-
Refrigerant or mechanical issues
If the refrigerator isn't cooling properly, consult the manufacturer's troubleshooting guide or a qualified technician.
How to Test Whether the Door Seal Is Working
There's a simple home check you can try.
Place a piece of paper between the door gasket and the refrigerator frame.
Close the door.
Then gently try to pull the paper out.
If the gasket creates resistance and the paper is held firmly, the seal is making reasonable contact at that location.
Repeat the test at several points around the door.
If the paper slides out very easily in one area while the rest of the seal feels tight, the gasket may not be making proper contact.
This isn't a professional diagnostic test, but it can help identify obvious sealing problems.
:quality(75)/2023_11_20_638360902533669248_lam-sach-gioang-cao-su-tu-lanh-11.jpg)
What If the Gasket Is Cracked?
Cleaning won't repair damaged rubber.
Look for:
-
Cracks
-
Tears
-
Hardened sections
-
Warping
-
Sections pulling away
-
Gaps when the door is closed
If the gasket is physically damaged, check your refrigerator model's replacement options.
Replacing a worn gasket can sometimes restore proper door sealing.
If you're unsure how to replace it, consider having the job done by a qualified appliance technician.
How Often Should You Clean Your Fridge Gasket?
There's no universal schedule for every household.
A practical approach is to inspect it regularly and clean it whenever you notice:
-
Food residue
-
Sticky areas
-
Dust buildup
-
Moisture
-
Unpleasant odors
-
Visible staining
For many households, adding a quick gasket check to a monthly refrigerator-cleaning routine is reasonable.
If you have young children or frequently experience food spills, you may need to clean it more often.
A Quick 5-Minute Maintenance Routine
You don't have to wait until the gasket becomes visibly dirty.
Once in a while:
1. Open the refrigerator door
Inspect the entire seal.
2. Pull back the folds gently
Look for hidden crumbs and residue.
3. Wipe with a damp cloth
Use mild soapy water.
4. Brush stubborn areas
Use a soft toothbrush.
5. Dry thoroughly
Finish with a clean towel.
This small routine can prevent heavy buildup from accumulating.
Common Mistake #1: Cleaning Only the Visible Surface
This is probably the most common mistake.
The outer edge may look clean while the inner groove is full of grime.
Always inspect the folds.
Common Mistake #2: Using Too Much Water
The gasket doesn't need to be soaked.
Excess water can run into areas where it shouldn't.
Use a damp cloth rather than pouring cleaning solution directly onto the seal.
Common Mistake #3: Scrubbing Too Hard
A refrigerator gasket is not a kitchen sink.
Avoid:
-
Steel wool
-
Hard brushes
-
Abrasive pads
-
Aggressive scraping
These can damage the sealing surface.
Common Mistake #4: Using Strong Chemicals Without Checking
More powerful doesn't necessarily mean better.
Harsh chemicals may discolor or damage certain materials.
Always check the manufacturer's cleaning recommendations before using disinfectants, solvents, bleach, or other strong products.
Common Mistake #5: Ignoring the Rest of the Refrigerator
A clean gasket is useful, but it doesn't replace routine refrigerator cleaning.
Don't forget to clean:
-
Shelves
-
Drawers
-
Door compartments
-
Handles
-
Interior spills
-
Condensation areas
Keeping the entire refrigerator clean is more effective than focusing on one component.
What About Bad Odors?
If your refrigerator has a persistent smell, don't assume the gasket is the only source.
Check for:
-
Spoiled food
-
Spills under drawers
-
Old containers
-
Food trapped behind shelves
-
Drainage areas
-
Mold or microbial growth
Once you've cleaned the source, the odor should gradually improve.
Baking soda can help absorb some refrigerator odors, but it isn't a substitute for removing spoiled food or cleaning the source.
Can a Dirty Gasket Make Food Spoil Faster?
Not necessarily by itself.
Food safety depends primarily on maintaining appropriate refrigerator temperatures, proper storage, and avoiding cross-contamination.
A dirty gasket can contribute to sealing problems if buildup prevents the door from closing properly, but it isn't accurate to say that a dirty gasket automatically causes food to spoil.
Keep your refrigerator at a safe temperature according to food-safety guidance and your appliance manufacturer's recommendations.
What If Your Refrigerator Door Doesn't Close Properly?
Don't ignore it.
A door that doesn't close completely can allow warm air to enter continuously.
Check:
-
Whether containers are blocking the door
-
Whether shelves are positioned correctly
-
Whether the gasket is dirty
-
Whether the gasket is damaged
-
Whether the refrigerator is level
If everything looks normal but the door still doesn't seal, consult the manufacturer's troubleshooting information.
A Simple Natural-Looking Cleaning Method
If you prefer to keep your cleaning routine simple, start with:
Warm water + a small amount of mild dish soap + a soft cloth
That's often enough for everyday dirt.
For difficult areas:
Soft toothbrush + mild cleaning solution
Then:
Clean-water wipe + thorough drying
You don't need to create a complicated mixture of vinegar, bleach, baking soda, and other products.
In household cleaning, mixing chemicals can create unnecessary risks.
When Should You Replace the Gasket?
Consider replacement when the seal is:
-
Torn
-
Cracked
-
Permanently deformed
-
Brittle
-
Pulling away
-
No longer sealing properly
A gasket that looks dirty can usually be cleaned.
A gasket that is physically damaged generally needs replacement.
How to Keep the Gasket Cleaner for Longer
A few simple habits can make a difference.
Wipe Spills Immediately
Milk, sauces, and sticky foods become harder to remove when they dry.
Don't Overfill Door Shelves
Items pressing against the gasket can interfere with the seal.
Keep Food Containers Closed
This reduces spills and odors.
Check the Seal Regularly
Early cleaning is easier than removing months of accumulated grime.
Dry Moisture
Don't leave standing water inside the folds.
The Bottom Line
Your refrigerator gasket may be one of the most overlooked parts of your kitchen.
Inside its folds, it can collect crumbs, grease, food residue, moisture, and dirt that aren't obvious at first glance.
Fortunately, cleaning it is usually simple.
Use warm water, a small amount of mild dish soap, a soft cloth, and a soft toothbrush for stubborn areas. Gently clean inside the folds, wipe away soap residue, and dry the gasket thoroughly.
Just as importantly, inspect the seal for cracks, tears, warping, or areas where it no longer makes good contact with the refrigerator.
Avoid aggressive scrubbing and don't experiment with mixtures of household chemicals. Never mix bleach with vinegar or ammonia.
Final Thoughts
A refrigerator doesn't need to be spotless every second of the day, but small maintenance tasks can prevent bigger problems.
The next time you're cleaning your kitchen, open the refrigerator door and take a close look at the rubber gasket.
You may be surprised by what is hiding inside those folds.
A few minutes with a damp cloth and gentle cleaner can remove built-up grime, improve overall cleanliness, and give you a chance to catch a damaged seal before it becomes a bigger appliance problem.
Sometimes the dirtiest part of the refrigerator is the part you almost never think to clean.