Put cleaning liquid on the cloth—not directly on the fan.
This gives you much better control over how much moisture reaches the appliance.
A Simple Trick for Stubborn Dust
If dust has been sitting on the blades for a long time, it may form a sticky layer that a dry cloth cannot remove easily.
In that situation, use a microfiber cloth lightly dampened with warm water and a small amount of mild dish soap.
Gently wipe the surface.
Then follow with a clean, damp cloth to remove soap residue and finish with a dry towel.
Avoid harsh chemicals unless the fan manufacturer's instructions specifically allow them.
Strong cleaners can damage certain plastics, finishes or printed labels.
What About Using a Hair Dryer?
Some people use compressed air or a hair dryer to blow dust away.
This can remove loose dust, but it has an obvious downside: the dust can simply be blown into the room.
If you use air to loosen dust, do so carefully and preferably in a well-ventilated area where the displaced dust can be cleaned afterward.
A vacuum cleaner with a soft brush attachment is generally more convenient for household cleaning because it captures much of the loosened debris.
A Common Mistake: Spraying the Fan Directly
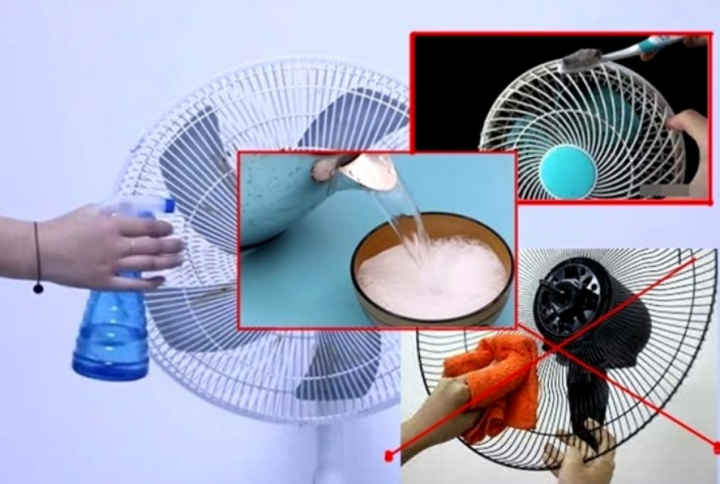
One of the biggest mistakes people make when cleaning appliances is spraying cleaning solution directly onto the surface.
This may seem convenient, but with an electric fan it creates an unnecessary risk.
Liquid can travel through grille openings and potentially reach the motor, wiring, switches or other electrical components.
Instead, spray or apply the cleaning solution to your cloth, if the product is appropriate for the surface, and then wipe the fan.
Even better, for routine dust removal, plain water on a well-wrung microfiber cloth is often sufficient.
Can You Use Water to Clean the Fan?
Water can be used on certain removable or non-electrical components if the manufacturer's instructions permit it.
But for a fan that remains assembled, you should take a conservative approach.
Do not soak the fan.
Do not pour water over it.
Do not spray water into the grille.
Do not immerse any part containing electrical components.
If a component can safely be removed according to the manufacturer's instructions and is specifically washable, it can be cleaned separately and allowed to dry completely before being reinstalled.
When in doubt, check the manufacturer's cleaning instructions for your particular model.
How Often Should You Clean Your Fan?
There is no single schedule that works for every household.
A fan used every day in a dusty environment may need cleaning much more frequently than one used occasionally.
As a practical routine, inspect the fan every few weeks during periods of heavy use.
If you can visibly see dust accumulating on the grille or blades, that's a good indication that it is time for cleaning.
Homes with pets may require more frequent attention because hair and dander can accumulate quickly.
Regular light cleaning is generally easier than waiting until the fan develops a thick layer of dust.
Signs Your Fan Needs More Than a Basic Cleaning
Sometimes dust is not the only problem.
If your fan continues to make unusual noises after cleaning, vibrates excessively, struggles to start, smells like something is burning, or behaves differently from normal, stop using it and investigate the issue.
These symptoms can have causes unrelated to surface dust.
For example, mechanical wear, a damaged blade, a loose component or an electrical fault may require professional attention.
Never open the motor housing unless you are qualified to work on electrical equipment and the manufacturer's instructions permit it.
What You Should Never Do
A few cleaning habits can create unnecessary risks.
Avoid:
-
Cleaning the fan while it is plugged in
-
Touching moving blades
-
Spraying liquid directly into the grille
-
Pouring water over the fan
-
Using excessive force on the protective grille
-
Inserting objects deep into the motor housing
-
Reconnecting the fan while wet
-
Ignoring burning smells or unusual electrical behavior
The goal is not simply to make the fan look clean. The goal is to clean it without creating a safety problem.
Make Cleaning Easier Next Time
One of the best ways to reduce cleaning time is to avoid allowing dust to build up in the first place.
A quick wipe every week or two can take only a few minutes.
You can also keep the area around the fan relatively clean and vacuum nearby floors and furniture regularly.
If your home has pets, removing loose hair and dust from surrounding surfaces can also reduce how much debris eventually reaches the fan.
A small amount of regular maintenance can save you from having to deal with a heavily contaminated fan later.
The Bottom Line
Cleaning an electric fan doesn't always have to mean taking the entire appliance apart.
For routine maintenance, unplug the fan, remove loose dust with a soft brush or vacuum, wipe the grille and accessible blades with a lightly damp microfiber cloth, and keep moisture far away from the motor and electrical components.
The most important principle is simple: clean gently, use as little moisture as necessary, and always disconnect the fan from power before touching it.
A few minutes of regular cleaning can help keep your fan looking better, reduce accumulated dust and make the appliance easier to maintain.
And sometimes, the simplest cleaning method is the one you're most likely to do consistently.