An electric fan can make a room feel noticeably more comfortable, especially during hot and humid weather. But there is one problem that many people tend to overlook: dust builds up surprisingly quickly on the blades, protective grille, motor housing, and other surfaces.
Over time, a fan that once looked clean can become covered with a layer of gray dust, lint, hair, and other debris. When the fan is running, some of that accumulated material can be disturbed and spread around the room.
The good news is that you don't always need to completely disassemble your fan to give it a basic cleaning. With a few simple tools and the right technique, you can remove a substantial amount of surface dust while keeping the process quick and manageable.
However, safety should always come first. Before cleaning any electric fan, switch it off and unplug it from the electrical outlet. Never spray water or cleaning solution directly onto the motor, electrical controls, or power cord.
Here is a simple method you can use at home.

Why Does an Electric Fan Get So Dirty?
Fans constantly move air through the room. Along with that air come tiny particles such as household dust, lint, hair, pet dander and other airborne debris.
Some of these particles stick to the fan blades and grille because of surface moisture, static electricity and the natural movement of air.
The more frequently you use the fan, the more quickly this buildup can become noticeable.
A dusty fan may also appear less effective because accumulated debris can interfere with airflow. Heavy buildup on the blades can also make the fan look unpleasant and may contribute to an unbalanced or noisy operation.
Regular cleaning helps keep the fan looking better and makes routine maintenance much easier.
What You’ll Need
You don't need a complicated collection of cleaning products.
Depending on how dirty your fan is, you can use:
-
A soft microfiber cloth
-
A soft-bristled brush
-
A vacuum cleaner with a brush attachment
-
A small bowl of warm water
-
A small amount of mild dish soap
-
An old toothbrush for difficult areas
-
A dry towel
The most important thing is not the number of tools you have, but keeping moisture away from the electrical components.
Step 1: Turn Off and Unplug the Fan
Before touching the fan, turn it off completely and unplug it from the wall.
This is one of the most important steps.
Do not rely only on the fan's power button. Once it is switched off, disconnect the plug from the outlet so there is no electrical power going to the appliance while you clean it.
If the fan has been running for a long time, allow it to cool down before cleaning.
Never attempt to wipe the blades while they are moving.
Step 2: Remove Loose Dust First
Before using a damp cloth, remove as much loose dust as possible.
A microfiber duster, soft brush or vacuum cleaner can work well for this.
Start around the outer protective grille and gently brush away the visible dust.
If you have a vacuum cleaner with a soft brush attachment, you can carefully vacuum the grille from the outside.
This approach has an important advantage: you collect the dust instead of simply pushing it into the air.
Avoid using excessive pressure. Protective grilles can bend, and forcing a brush through the openings may damage them.
Step 3: Clean the Front Grille
The protective grille is often one of the dirtiest parts of an electric fan because it sits directly in the path of moving air.
Use a dry microfiber cloth or soft brush to remove loose dust first.
For more stubborn grime, slightly dampen the cloth with water and a small amount of mild soap.
The cloth should be damp, not dripping wet.
Wipe the grille section by section.
If the grille has narrow openings, an old soft toothbrush can help reach areas that are difficult to clean with a cloth.
Be patient rather than pressing hard. Several gentle passes are usually safer and more effective than aggressively scrubbing the surface.
Step 4: Clean the Fan Blades Carefully
The blades can collect a surprising amount of dust.
Because you are not completely disassembling the fan, you may need to work through the grille openings.
Slowly rotate the blades by hand only while the fan is unplugged, allowing you to access different sections.
Hold the blade gently while wiping it with a microfiber cloth.
For heavier dust, use a slightly damp cloth with mild soap.
Afterward, use a clean, dry cloth to remove remaining moisture.
Do not pour or spray water onto the blades.
More importantly, do not allow water to run toward the motor housing.
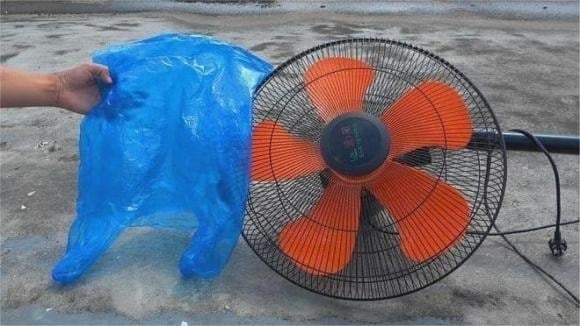
Step 5: Don't Forget the Back of the Fan
Many people clean only the front because that is the part they can easily see.
But the rear grille and motor housing can also collect dust.
Use a soft brush or vacuum attachment to remove loose debris from the back.
Pay particular attention to ventilation openings around the motor housing.
These openings are designed to allow heat to escape, so keeping them reasonably free of dust is part of good routine maintenance.
However, do not insert brushes, cloths or other objects deeply into the motor housing.
Step 6: Clean the Stand and Controls
The fan's stand, base and control panel can also collect dust and fingerprints.
These areas are usually easy to clean.
Use a slightly damp microfiber cloth to wipe the exterior surfaces.
For buttons and control switches, avoid allowing liquid to seep into gaps.
A good rule is simple: