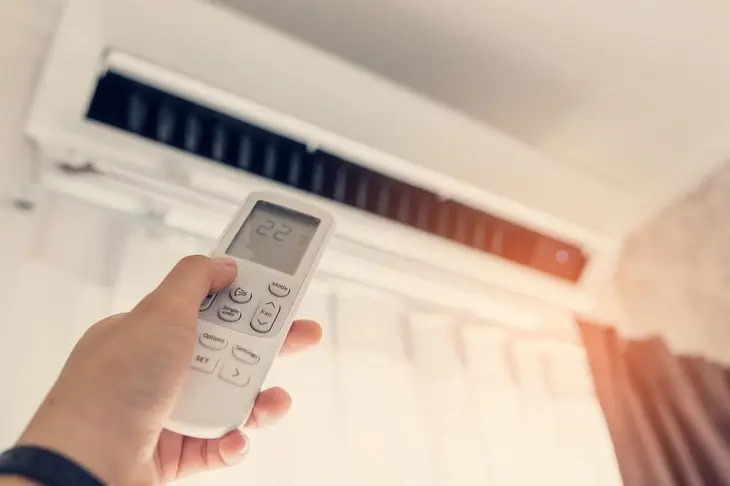
Should You Use High or Low Fan Speed on Your Air Conditioner?
Air Conditioner Fan Speed: Is High or Low the Better Choice?
Tips 02/08/2026 01:30
Few household problems are as frustrating as moldy, peeling walls. What may begin as a few small dark spots or patches of flaking paint can quickly become a larger issue if left untreated. Beyond affecting the appearance of your home, mold and peeling paint may signal excess moisture, leaks, or poor ventilation that deserve attention.
The good news is that many cases of minor mold growth and peeling paint can be addressed safely with the right approach. However, it's important to understand that simply painting over mold or scraping away damaged paint without fixing the underlying moisture problem usually provides only a temporary solution.
This guide explains why mold and peeling walls happen, how to address them safely, and what you can do to help prevent them from returning.

Mold thrives in damp, humid environments where moisture is consistently present. At the same time, paint begins to peel when moisture weakens its bond with the wall surface.
Common causes include:
Roof leaks
Plumbing leaks
High indoor humidity
Condensation
Poor ventilation
Flood damage
Rising damp from foundations
Water entering through exterior walls
Improper surface preparation before painting
Unless the source of moisture is corrected, mold and peeling paint are likely to return.
Before cleaning or repainting, determine why the wall became damp.
Inspect for:
Look beneath sinks, around toilets, behind washing machines, and near water pipes.
Check ceilings and upper walls for water stains after rainfall.
Condensation often forms during cold weather when warm indoor air meets cool glass.
Rainwater may enter through damaged siding or cracked masonry.
Bathrooms, kitchens, laundry rooms, and basements are especially prone to moisture buildup.
Addressing the moisture source is the most important step in achieving a long-lasting repair.
Not all mold problems are the same.
Small patches on non-porous or painted surfaces may sometimes be cleaned safely by homeowners.
However, larger areas or mold caused by contaminated water often require professional remediation.
As a general guideline, if mold covers a large area, has spread inside walls, or is associated with significant water damage, consider consulting a qualified mold remediation professional.
Cleaning mold can release spores into the air.
Before starting, wear appropriate protective equipment, such as:
Disposable gloves
Protective eyewear
A well-fitting respirator or mask appropriate for mold cleanup (depending on the extent of the work)
Long sleeves and pants
Open windows if possible and improve ventilation during cleaning.
Keep children and pets away from the work area until cleanup is complete.
For small areas of mold on painted, non-porous surfaces, you can often clean the wall using a mild detergent solution or an appropriate commercial mold-cleaning product according to the manufacturer's instructions.
General steps include:
Dampen (do not soak) the affected area.
Gently scrub with a soft brush or sponge.
Wipe away residue with clean water if appropriate.
Dry the surface thoroughly.
Avoid aggressively dry-brushing mold, as this may release more spores into the air.
If using any cleaning product, always follow the product label and never mix chemicals, especially products containing bleach with ammonia or acidic cleaners, as this can create dangerous gases.
Moisture trapped beneath fresh paint is one of the most common reasons repairs fail.
After cleaning:
Increase ventilation.
Use fans if needed.
Run a dehumidifier in humid spaces.
Allow the wall to dry completely before making repairs.
Drying may take anywhere from several hours to a few days depending on humidity and wall materials.
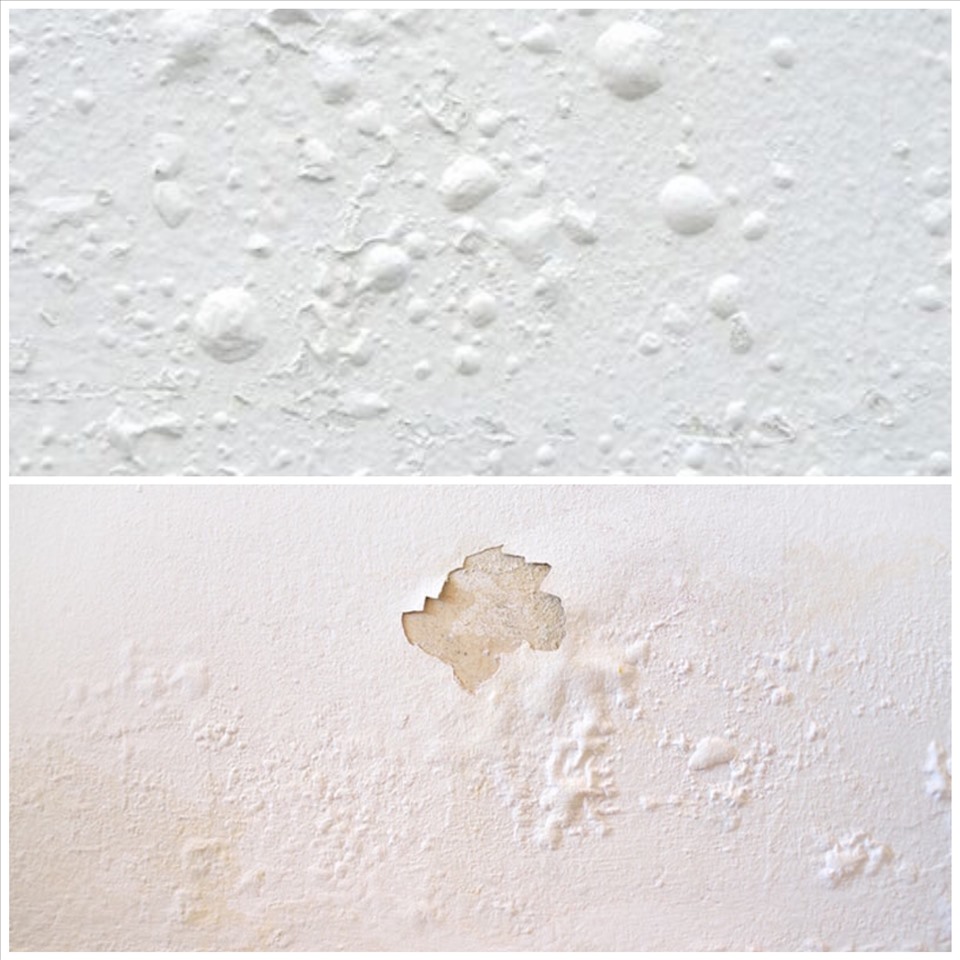
Once the wall is completely dry:
Use a paint scraper to remove loose paint.
Sand rough edges to create a smooth transition.
Remove dust with a damp cloth after sanding.
If your home was built before lead paint regulations were introduced in your country, older paint may contain lead. In that case, consult local guidance or a qualified professional before sanding or disturbing painted surfaces.
If moisture has caused cracks or holes:
Fill small imperfections with an appropriate wall filler or patching compound.
Allow it to dry fully.
Sand smooth.
Severely damaged drywall or plaster may need partial replacement rather than simple patching.
A quality primer helps improve paint adhesion and provides a more even finish.
In areas previously affected by moisture, many homeowners choose primers designed for moisture resistance or stain blocking.
Allow the primer to dry according to the manufacturer's instructions before painting.
Choose a high-quality interior paint appropriate for the room.
For bathrooms, kitchens, laundry rooms, and other humid areas, paints labeled for high-moisture environments may offer better durability.
Apply:
Thin, even coats
Adequate drying time between coats
Proper ventilation while painting
Avoid painting over damp surfaces.
Repairing the wall is only part of the solution.
Preventing excess moisture is equally important.
Use exhaust fans in:
Bathrooms
Kitchens
Laundry rooms
Leave fans running for several minutes after showering or cooking.
Opening windows when weather permits also improves airflow.
Many experts recommend maintaining indoor humidity between 30% and 50%.
Helpful tools include:
Dehumidifiers
Air conditioners
Hygrometers to monitor humidity levels
Reducing humidity limits the conditions mold needs to grow.
Even a slow drip can create enough moisture for mold to develop.
Inspect your home regularly for:
Pipe leaks
Roof damage
Window leaks
Foundation cracks
Prompt repairs can prevent more extensive damage later.
Avoid placing large furniture tightly against exterior walls if condensation is a recurring problem.
Allow air to circulate behind cabinets and wardrobes.
Dry wet areas as soon as possible after spills or flooding.
Bathrooms and kitchens benefit from routine cleaning.
Regular maintenance helps reduce soap scum, dust, and organic material that mold can feed on.
Many homeowners unintentionally make repairs that only hide the problem temporarily.
Avoid these common mistakes:
Painting directly over mold.
Ignoring the source of moisture.
Using excessive water during cleaning.
Skipping the primer.
Repainting before the wall is fully dry.
Blocking ventilation after repairs.
Assuming mold will disappear on its own.
Addressing the underlying moisture issue is always the key to lasting success.
While minor cosmetic damage may be manageable, some situations require expert help.
Consider contacting a qualified contractor or mold remediation specialist if:
Mold covers a large area.
The mold repeatedly returns after cleaning.
There is extensive water damage.
The drywall feels soft or crumbles.
You suspect mold inside walls, ceilings, or HVAC systems.
Household members have health conditions that could make mold exposure more concerning, such as asthma or weakened immune systems.
Professionals can identify hidden moisture sources and recommend appropriate repairs.
Preventing mold also contributes to better indoor air quality.
Healthy home habits include:
Vacuuming with a HEPA-filter vacuum when appropriate.
Replacing HVAC filters regularly.
Keeping gutters clean.
Directing rainwater away from the home's foundation.
Ensuring crawl spaces and basements remain dry.
Maintaining good airflow throughout the house.
These simple practices can reduce moisture problems and help create a healthier living environment.
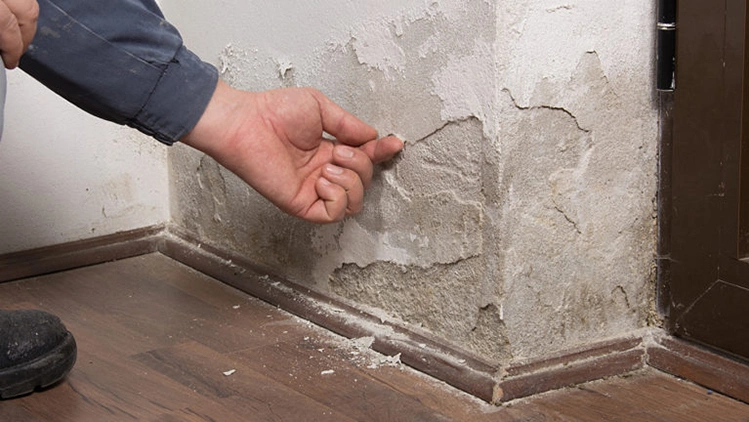
Moldy and peeling walls are more than just cosmetic concerns - they are often signs that excess moisture is affecting your home. Successfully repairing the damage requires more than scraping paint and applying a fresh coat. The most important step is identifying and correcting the source of moisture before beginning any repairs.
Once the underlying problem has been resolved, careful cleaning, thorough drying, proper surface preparation, and the use of quality primers and paints can help restore your walls safely and effectively. Just as importantly, maintaining good ventilation, controlling indoor humidity, and addressing leaks promptly can reduce the chances of mold returning.
If the affected area is extensive, the damage is severe, or you suspect mold has spread behind walls or into hidden spaces, don't hesitate to seek professional assistance. Taking action early can help protect both your home and the health of everyone who lives in it.
Air Conditioner Fan Speed: Is High or Low the Better Choice?
⚠️ If You Do This After Cooking, You Could Be Shortening the Life of Your Pipes…

That decorative cloth serves more than just an attractive hotel room design.

Before planting this season, see which plants snakes prefer most.

Checking Into a Motel? Don't Miss These Important Room Inspections
Stop Mopping With Plain Water—Try This Simple Upgrade Instead

Is an Egg With a Red Spot Safe to Eat?


Trust Your First Impression... Then Read the Result!

Can You Still Drive After 70? The Answer May Surprise You

You've Probably Been Choosing Chicken the Wrong Way

A simple water bottle trick can reveal hidden issues beneath hotel beds.

Red Bones in Cooked Chicken: Safe or Dangerous?

One Small Shirt Detail Reveals a Fascinating Piece of History

How to Manage Toenail Fungus Naturally: Tips, Safety, and Medical Treatments
What Happens If You Eat the Dark Vein in Shrimp?

Want Tomatoes to Last Longer? Stop Doing This One Thing
Found This Tiny Insect in Your Kitchen? Check Your Pantry Now

Rice Water for Your Skin: 5 Uses You Should Know About

Discover 11 Time-Honored Honey Remedies for Everyday Wellness
Air Conditioner Fan Speed: Is High or Low the Better Choice?

Want More Iron in Your Diet? These Heart-Healthy Vegetables Are Worth Adding

Understanding Kidney Disease: 6 Foot Symptoms That Shouldn't Be Ignored
6 Common Symptoms That May Indicate an Impacted Wisdom Tooth

Onions, Uric Acid, and Stroke Prevention: What Research Says

Nuts and Your Health: What Research Says About Their Benefits and Potential Risks

Smart bedtime drink choices may support better heart and vascular health.

🧠 What Does Eating Peanuts Really Do to Your Body? Here’s What Experts Want You to Know

🌙 You Wake Up at 3 or 4 A.M. for a Reason — But It May Not Be What You Think…

👀 What You Pour Down the Kitchen Sink Matters More Than You Think…
⚠️ If You Do This After Cooking, You Could Be Shortening the Life of Your Pipes…

Before You Reach for Ginger, Check These 5 Health Conditions First

Persistent vomiting in children should never be ignored or self-treated.

A daily avocado may offer surprising health benefits when eaten wisely.

Your Swollen Feet Could Be Missing These 5 Essential Nutrients
That decorative cloth serves more than just an attractive hotel room design.

Some morning symptoms deserve attention, but they are not cancer-specific.

❤️ These Everyday Foods Can Help Support Healthy Arteries — Here’s What to Add to Your Meals