 Intermediate
A room with great acoustics can be any shape or size, depending on which space of a house, apartment, garage, or other building you transform to create it. Whatever the original purpose of that particular room initially was when it was built, there was probably not a single thought given to any acoustical betterment.
Step 1 – Soundproofing or Acoustic Treatment?
Browse acoustic panels on Amazon.
It’s critical here to understand how to deal with the reverberations and echoes in a room you want to be set up for great acoustics. We are dealing with sound and there are two ways that sound can travel.
1.1 – Dealing with Reverberations and Echoes
Acoustics is the science behind the production, control, transmission, reception, and effects of sound and it gives a better understanding of how to reduce the reverberations and echoes by using proper acoustic treatments to manage the sound energy in your room.
Sound travels through the surrounding air medium and is subject to bounce against the hard wall and ceiling surfaces creating reverberations and echoes inside a room. Managing such issues for a better listening experience could be challenging but easier to accomplish through acoustic surface treatment inside a cubical room rather than an irregular space with alcoves, closets, angled walls, or ceilings, where sound waves can bounce around in unpredictable ways resulting in many unwanted “noises”, fluttering, and echoes significantly distorting the sound.
A plain rectangular room offers you a consistent length, width, and height and provides predictability and confidence in the way the acoustics of that room will perform with its surfaces, making it much easier to predict and manage sound wave reflections with proper acoustic treatments. Wherein walls, ceiling, or floor are non-absorptive, sound-absorbing porous materials such as soundproofing Rockwool or polyurethane foam, mass loaded vinyl (MLV), Green Glue Compound, and many others can be added to the surfaces to adsorb and attenuate that sound energy.
As well, soundproofing the walls and ceiling to trap and absorbs sound energy, also adds to the acoustic treatments by preventing the reflection of sound vibrations and further reducing reverberations and echoes.

1.2 – Blocking Sounds from outside Sources
Sound also travels through solid materials such as glass, metal, wood, or any other hard medium that pick up the frequencies of the sound and transmit the resulting vibrations through its medium. Just as sounds can cross over into the next room they can also pass through the wall from the other side and create interference on this side. A typical example of this is watching a movie at a multiplex theater with questionable acoustics and hearing bass sounds from the movie playing next door. While you can’t completely block sound energy, however, soundproofing the room through “acoustic decoupling” with the use of materials that substantially reduce or absorb sound energy, can greatly reduce the amount of sound energy that either leaves or enters a room.
Step 2 – Understanding Wall and Ceiling Decoupling
Decoupling a wall or a ceiling is the means of mechanically separating different layers of the wall (the drywall from the studding) so vibrations submitted to one layer cannot be transmitted to the next layer. If sound energy from outside vibrates the exterior surface of the wall and its wood structure, the vibrations are not transmitted to the drywall inside. The same reaction occurs in the opposite direction where the sound energy inside the room vibrates the drywall but cannot be transmitted further, and is simply “absorbed” within the drywall.
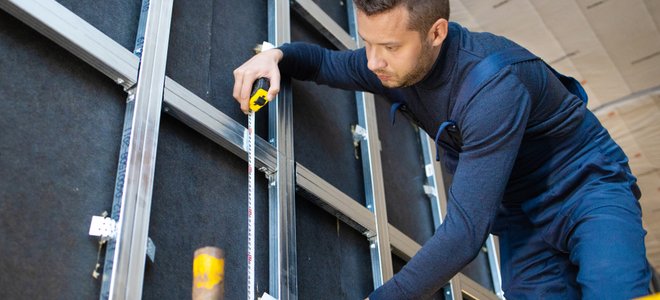
Acoustic decoupling can be achieved with the use of special metal channels, aluminum or steel, secured at regular intervals and perpendicular to the structure’s framing, and thus creating a sort of grid-like network on the studs and joists. Two different types of channels can be chosen for that purpose, the Resilient Channel and the Hat Channel.

Step 3 – Choosing Soundproofing Hardware Mounts3.1 – Resilient Channels
A resilient channel is a bent strip of perforated metal that creates a spring-like edge onto which sheeting material can be attached. There are two bends in the 3-surface channel, creating 3 surfaces of which the brim (flange) on one edge is used to fasten it to the structural frame while the third surface laying parallel to the flange, is used to screw on the sheeting material to keep it at a distance from the joists and studs and eliminate direct contact. Fastening the channel through the flange ensures some flexibility, but it can easily be compromised if not handled and installed properly.
3.2 – Hat Channels
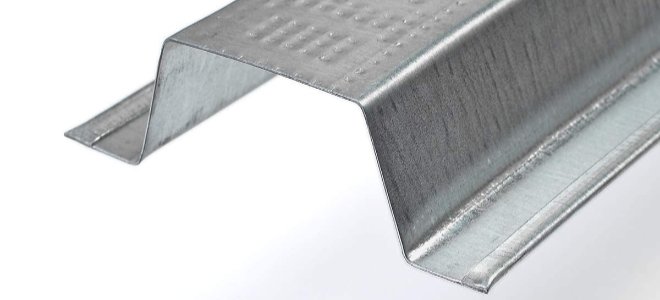
A hat channel is an aluminum or galvanized steel strip-like channel with two flanges at the edges on the open side that are used for fastening to the studs or joists. It is attached to the structure in the same fashion of a grid-like network as with the Resilient channel. The brim is screwed or nailed to the structural pieces while the drywall is screwed to the surface of the “crown”. The Hat Channels are available in different offset depths (from the brim to the crown) of 7/8 inch to 1-1/2 inches (22 to 38 mm) creating an airspace that can result in improving the sound control effectiveness.
The double attachment provided by the Hat Channel makes it a more solid and stable installation secured directly to the studs but deprives it of flexibility and creates a rigid installation prone to transmitting vibrations.
Browse hat channel supports on Amazon.

3.3 – Sound Isolation Clips
Sound isolation clips are special devices composed of a soft bumper at the center of a bracket designed to keep the metal channels isolated from the studs or the joists. The clips are designed to accept and secure the two flanges of the Hat Channel while it is attached to the structural frame through its rubber padding, thus keeping the sound vibrations from further radiating through the solid structure.
Sound Isolation Clips used in conjunction with compatible Hat Channels make for an assembly that’s more effective and reliable than resilient channels at reducing sound transfer through walls or ceilings.
Step 4 – Choosing Acoustic Treatment Materials
The effectiveness of soundproofing materials is rated under the Sound Transmission Classification (STC), which will be mentioned hereon. The following is a few more ways for you to improve your soundproofing and acoustics.
Mass Loaded Vinyl (MLV) is a polymer sheet you can attach to the studs and joists before sealing it. It will add an extra STC of 21 and 31 depending on the thickness.
Polyurethane Foam Panels are open-celled acoustic panels that reduce the amplitude of sound waves (by increased air resistance).
Acoustic sound-deadening drywall (or sound-deadening panel) can provide an STC range between 47 and 80, depending on brand and thicknesses.Double Drywall—the extra layer of drywall increases the mass and in turn the STC rating by up to 10 points (a 1/4 inch of acoustic caulking around the perimeter will maintain decoupling from other adjacent surfaces).
Green Glue Compound applied between two layers of drywall will dampen up sound vibrations up to 70% or more.
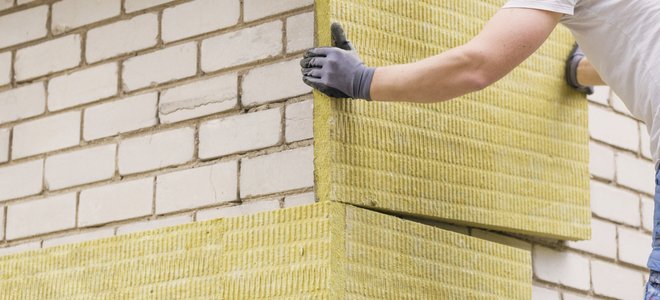
Soundproofing Rockwool is a high-density insulation material that is extremely resistant to airflow and excellent at sound absorption and at noise reduction.
When you purchase through links on our site, we may earn commissions at no cost to you.
More From Doityourself Using Rigid Insulation Foam to Soundproof a Wall Create A Soundproof Room On The Cheap
Source link : https://www.doityourself.com/stry/garage-soundproofing-2-tips-for-avoiding-a-flutter-echo


