
 5-10 hours • Intermediate • 1-100 What You’ll Need Storage bin Net pots Hydroponic nutrient solution Air pump Air stone Plant lighting Drill Hole saw with arbor pH meter/pH down Pipettes What You’ll Need Storage bin Net pots Hydroponic nutrient solution Air pump Air stone Plant lighting Drill Hole saw with arbor pH meter/pH down Pipettes
If gardening in the dirt is no longer a challenge for your skilled DIY hands, take a plunge (Haha! Get it?) into the dynamic world of hydroponics. With a few easy-to-procure materials, you’ll have access to fresh, tender veggies in no time. But first, the work…
Location, Location, Location!
Decide where your hydroponic garden will live. If you live in a mild climate you can set up outside. Those who are subject to extremes in weather will have to find indoor space. Either way, keep in mind access to water for filling the bin, how you will empty it, and proximity to electricity for proper lighting. Once you’ve got the location, establish your new garden project in situ, since it’ll be heavy and unwieldy once it’s full of water.
What Are the Types of Hydroponic System?
There are six basic types:
Wick
The Wick system is extremely simple. Plants grow in a planting medium such as perlite. A nylon wick siphons water and nutrients into the medium. While extremely simple, it’s also a bit limiting due to the lack of control you have in nutrition maintenance. For this reason, you’re limited to smaller plants and ones that don’t require heavy feeding.
Ebb and Flow
The Ebb and Flow system incorporates a submerged pump to flood the tray of plants delivering water and nutrients to their roots. After flooding, the excess solution drains into a reservoir. Because it relies on electricity to pump the nutrients to the roots several times a day, plants can be vulnerable when power outages occur.
Drip System
The Drip System is widely used and relies on timers and a submersible pump to drip nutrient solution at the base of each plant. Plants grow in a planting medium and the whole system can be either recovery-based or not. A recovery system allows you to reuse the excess solution, but it requires monitoring to ensure the pH and nutrient strength remain constant. A non-recovery system doesn’t require you to monitor the nutrient strength or pH since the excess simply drains away.
Nutrient Film
The Nutrient Film Technique (N.F.T.) maintains a constant flow of nutrient solution via a pump for recirculation. Plants are grown in net pots suspended over a grow tray, usually without a grow medium. This type of system is also reliant on electricity, and because roots are exposed to air, they can be easily damaged when power is interrupted.
Aeroponics
The Aeroponic system is similar to the N.F.T. on a more high-tech level. Timers are set to provide controlled misting of nutrient solution to the roots every few minutes.
And finally…
Water Culture
The Water Culture system is probably the simplest of all hydroponic systems. Plants are suspended into a tray containing the nutrient solution. An air stone attached to a pump provides oxygen to the roots. Water loving lettuces do well in these types of systems, unlike large plants or ones that take a long time before harvest.
Which System Should I Use?
If you’re an atypical homeowner with enough space to fill an airplane hangar, and you’re willing to put in the effort and money into a large hydroponic system, you can pretty much put in any type of system you want and make it as complex as your heart desires.
For those of us who are very tentatively dipping our toe (Haha, we did it again!) into the world of hydroponics, the Deep Water Culture (DWC) system is the way to go. It’s simple. Affordable. And did we mention simple?
Step 1 – Find a Container
Preferably one with a lid. With DWC, because you have a greater volume of water to manage, there’s less instability when it comes to issues with pH and nutrient content than there is with a shallow container. Weird isn’t it? Think of a goldfish bowl versus a 30-gallon aquarium. That little goldfish bowl can spike in temperature and decrease water quality much more quickly than the larger aquarium. Make sense?
And to avoid algae growth, choose a container that doesn’t allow light to penetrate. Deep plastic storage totes will work great for this.
Step 2 – Drill Holes in Lid
Holes should be slightly smaller than the net pots so the rim can sit on the lid without the whole pot falling inside. You can drill multiple holes to accommodate multiple plants, but keep in mind their mature size when planning the spacing. Place a block of wood underneath the lid while drilling to stabilize it and keep it from cracking the plastic.
Step 3 – Set Up Air Pump
A simple air pump with tubing and an air stone can be purchased from any pet supplies store. Some of the less expensive pumps don’t have a check valve, which means you can’t place it below water level otherwise you risk water being siphoned into the pump. Determine whether your pump has a check valve or not so you can place it accordingly.
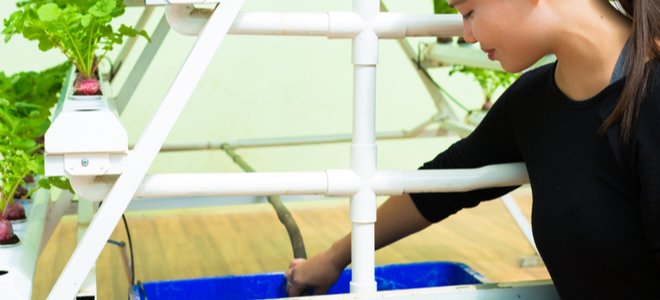
Step 4 – Channel Your Inner Science Nerd
This is where the fun science begins. Fill it to within 1-2 cm to the top. Add the hydroponic nutrients following the directions on the bottle. Adjust the pH–veggies like it a little acidic. If you have to reduce the pH with pH down, wear gloves and thoroughly mix the solution afterward.
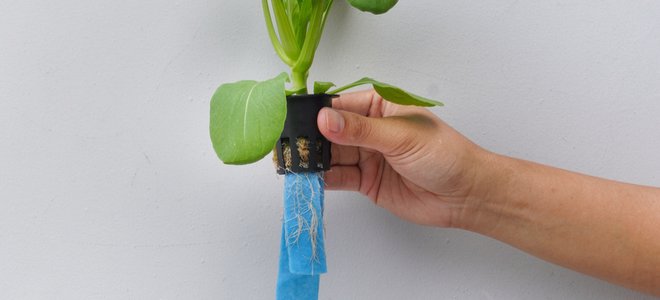
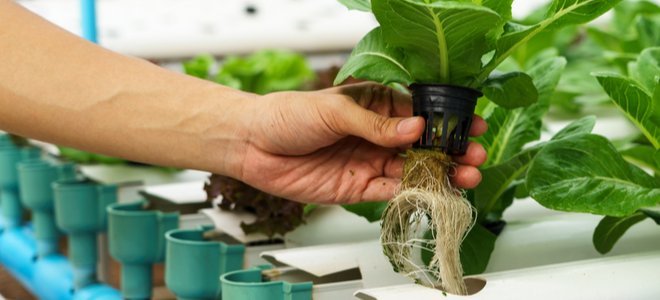
Step 5 – Install Your Plants
Connect tubing to the air stone and submerge it into the container. It should bubble away happily when the air pump is switched on. Securely attach the lid to the top. Place your plants into the net pots and drop them into the holes you’ve drilled into the lid.
While it’s possible to install plants that have been grown in soil, it’s not an ideal medium. Plants grown in Rockwool or clay pellets make less mess (and more sense!) You can install seedlings that you’ve grown prior to setting up your system, or you can direct seeds into a Rockwool plug and place them into one of the net pots. You could also try installing cuttings into the plugs. Hey, since you’re getting all sciencey and experimental, you might as well give it all a try!
Maintenance after Installation
Your new hydroponic garden isn’t a set it and forget it situation. You’ll have to monitor water, pH, and nutrition levels. Lift the lid and check at least weekly to ensure water level hasn’t fallen too low so roots are no longer in contact with it. Check pH after adding water, and add nutrient solution as needed. You’ll also need to clean your hydroponic system and replace the water every 14-21 days.
Building a hydroponic garden is a labor of love that will reward you in volumes!
Source link : https://www.doityourself.com/stry/how-to-set-up-a-hydroponic-garden


")


