
 1 hours • Intermediate • 20 What You’ll Need Multimeter or receptacle tester Charger Electronic device to be charged What You’ll Need Multimeter or receptacle tester Charger Electronic device to be charged
So much of our lives have become dependent on electronic devices. As such, battery chargers are essential. They charge the devices that help us work, learn, learn, and, arguably most importantly, relax.
If your device doesn’t seem to be charging, there may be an issue with the battery charger. Rather than going out and buying a new battery, which can be costly depending on your device, you can test to see if the charger and battery are working correctly.
Caution
To test the charger, you’ll be using a multimeter. You might want to take a moment to familiarize yourself with the instructions to make sure you’re using the correct settings.
Also, make sure not to get the device wet or drop it. Both can cause serious damage to the device or you. Don’t touch the device you’re testing with bare hands, and consider wearing some gloves while you work, just to be safe.
Step 1 – Check the Cord
Browse battery chargers on Amazon.
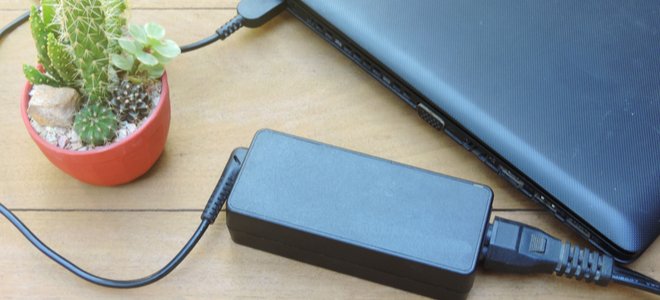
Before doing anything more difficult, check the charger. Make sure it is not twisted or knotted. If it is, try to straighten it. Also, check for frayed wires. If there is fraying on the wires, you will likely need a new charger. If it is just slightly bent but otherwise intact, you may want to straighten it out and see if that helps it charge your devices.
Step 2 – Check the Outlet
Before you check the charger itself, make sure the outlet you are using is working. This will help you determine if the charger is at fault. One easy way to check if the outlet is working is to take a device you know is working correctly when plugged into another outlet, like a lamp, and see if it works when plugged into the outlet you are using.
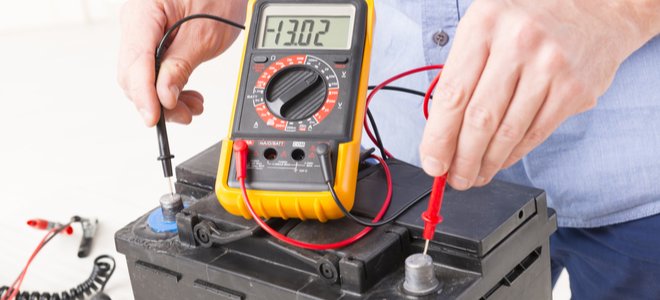
Some devices require more current than others, so there are more scientific ways to check this using a multimeter. To do this, attach the probes, turn them on, and set the device to the AC Volts setting. Put the probes into the slots in the outlet and wait for reading on your multimeter. Generally speaking, readings between 110 volts to 120 volts mean your outlet is working correctly.
Step 3 – Check the Charger
The manual that came with your charger will likely have some advice to understand if it is working properly. If you no longer have a copy of the manual, you may be able to find it online instead. Connect your charger to the device you are charging in an outlet that you have determined to be working, and see if it is working. Most devices will have a charging symbol come on or a green dot when it is actively being charged.
Step 4 – Check the Battery
If the charger does not appear to be working, it could be the charger, or it could actually be the battery. If you have more than one device that uses the same charger, see if the charger works on other devices. If it works on them, then it is likely the battery of the individual device is faulty.
You can also try using a different charger on the battery. If a different charger gets the job done, it is not an issue with the battery itself.
Step 5 – Clean
If the battery is the issue, you can give it a very gentle, light cleaning. Open your device and take the battery out. Lightly dust it, as well as the inside of your device. Some particles may have gotten into the area over the years, making it difficult to charge.
Step 6 – See a Professional
If, after all these steps, your device is still not charging, it’s time to bring in the pros. They may be able to fix the charger or recommend a new charger or battery for your device. Make sure to ask them what you can do to make sure the same issue does not occur again.
When you purchase through links on our site, we may earn commissions at no cost to you.
More From Doityourself Multimeter Basics Troubleshooting Your Analog Multimeter 3 Common Coax Splitter Problems Explained
Source link : https://www.doityourself.com/stry/how-to-test-a-battery-charger


")


