Why should you do that?
Tips 13/05/2025 15:45
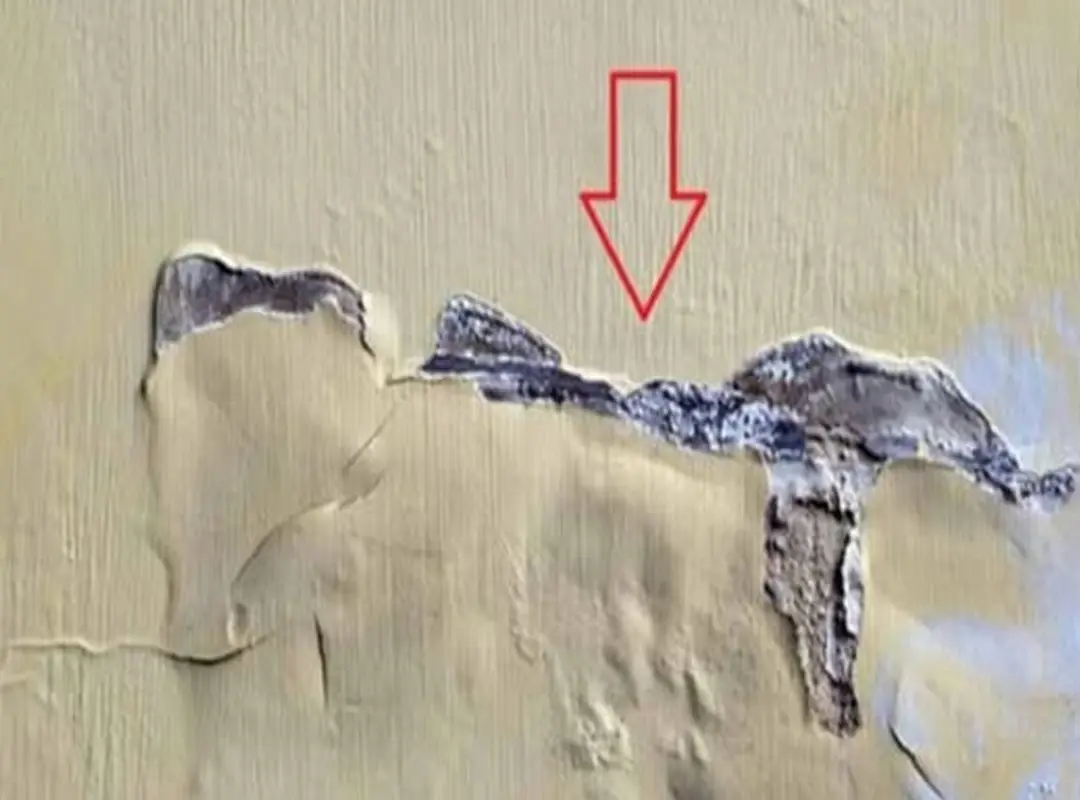
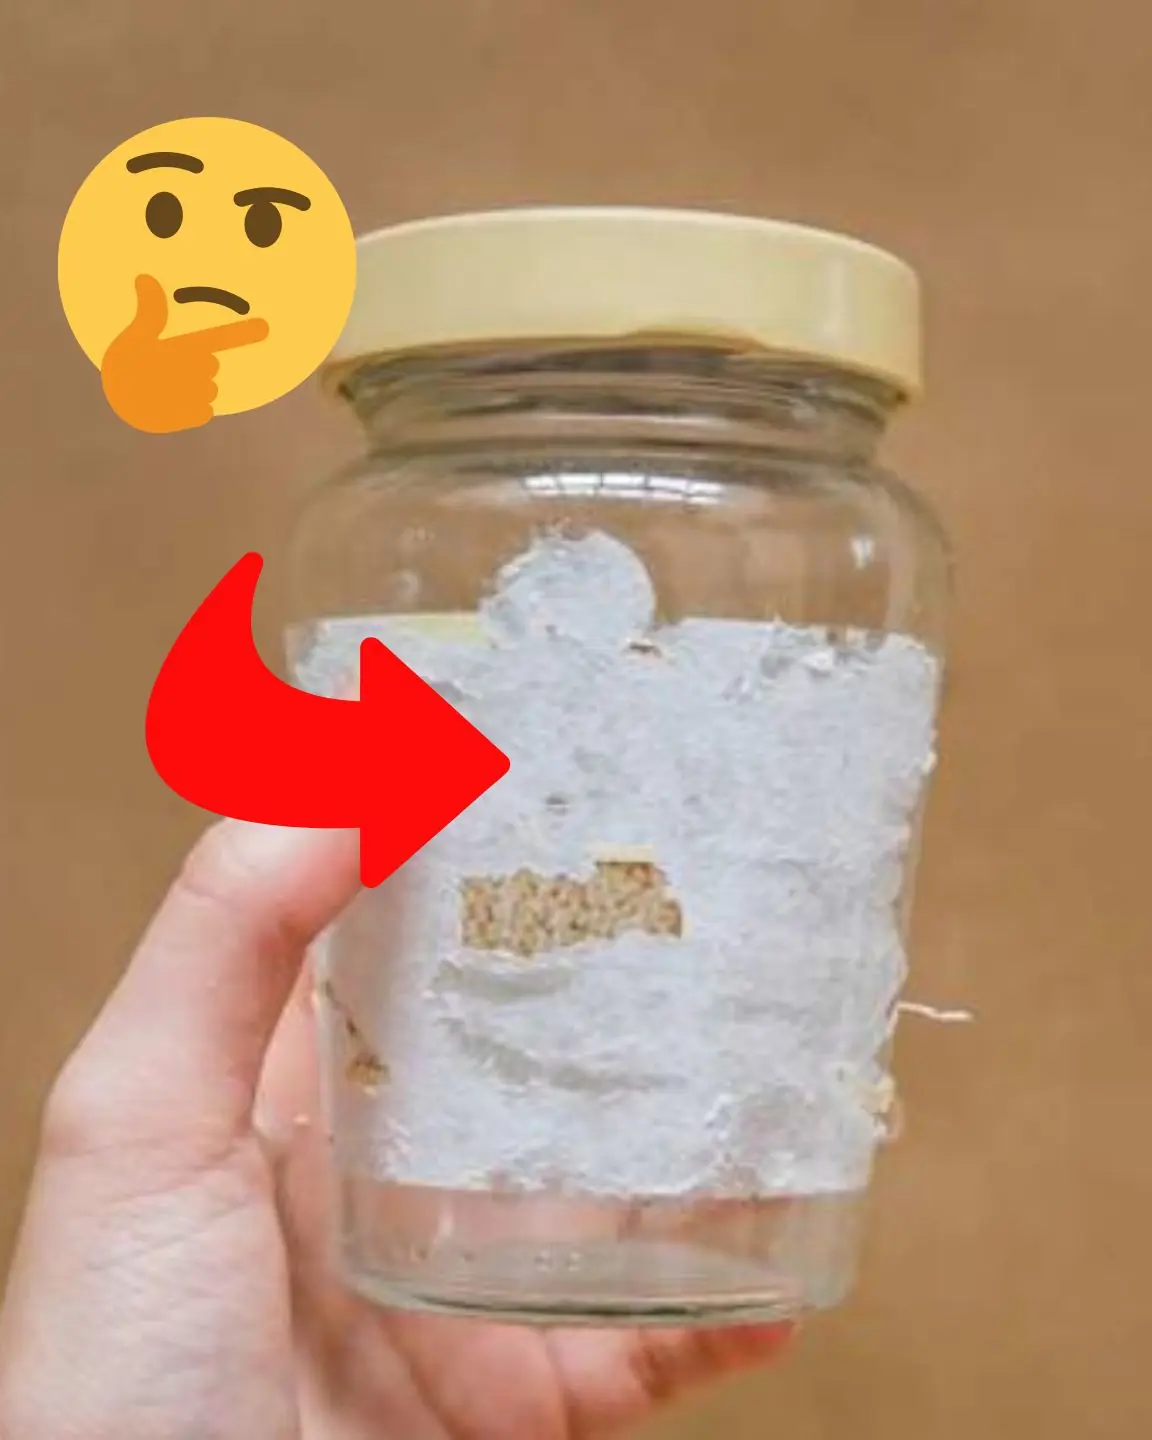
How to Deal with Moldy, Peeling Walls: An Easy, Free Solution for Every Home
When we think about maintaining a home, one of the most common issues that arise, especially in damp environments, is mold and peeling walls. These problems are not only unsightly but can also affect the structural integrity of your house. Fortunately, there's an incredibly simple, cost-free solution to deal with these problems. This guide will explain how you can quickly and effectively address mold and peeling walls, all with basic materials you likely already have at home.
Understanding the causes of peeling walls and mold growth is the first step toward prevention. Moisture is the primary culprit. Humidity in the air, often caused by poor ventilation, leaks, or water ingress, can lead to mold growth and paint or wallpaper peeling. When moisture accumulates on walls, it softens the paint or wallpaper, causing it to peel away.
Mold thrives in damp environments and feeds on organic materials, such as the paper backing on wallpaper or the wood in drywall. Over time, this can cause significant damage if left unchecked.
Thankfully, you don't need to hire expensive professionals or purchase costly chemicals to tackle this problem. With a few basic ingredients and some elbow grease, you can restore your walls to their original condition. Here's a step-by-step guide to help you solve the issue.
You will need:
White vinegar or hydrogen peroxide
Baking soda (optional)
A sponge or soft cloth
A scraper or putty knife
Paint (optional)
Fan or dehumidifier (optional)
The first step is to remove the peeling paint or wallpaper. Use a scraper or putty knife to gently peel away the loose areas. Take care not to damage the underlying wall, especially if it's drywall. It’s important to remove all the peeling sections to ensure the wall is smooth and ready for the next steps.
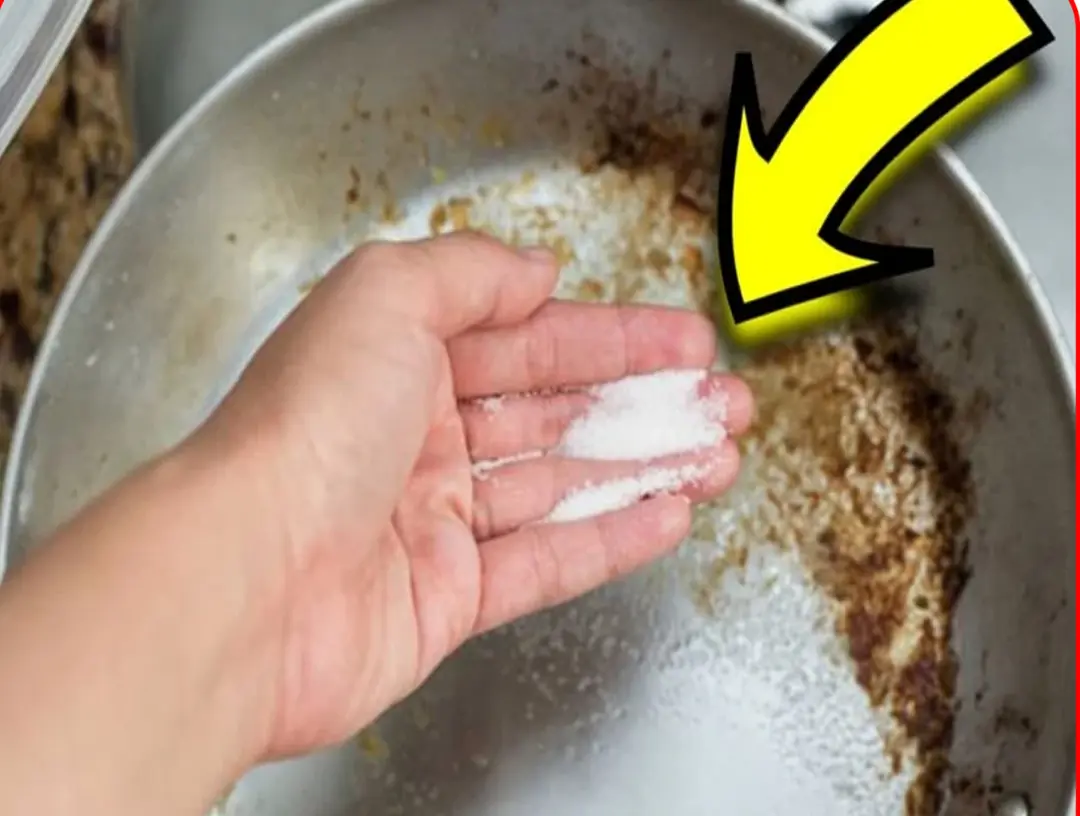
After scraping the walls, the next important step is cleaning the surface. White vinegar or hydrogen peroxide is perfect for this task as both are natural disinfectants. Simply mix a solution of one part vinegar to one part water or use hydrogen peroxide directly.
Using a sponge or soft cloth, scrub the affected areas to remove any mold or mildew. For stubborn mold, apply baking soda to the surface and scrub again. This will help break down the mold and eliminate the musty odor often associated with damp walls.
Once you've cleaned the area, it's crucial to dry the wall completely. Mold thrives in damp environments, so use a fan or a dehumidifier to dry the wall thoroughly. Open windows if possible to allow for ventilation, helping to reduce moisture in the air and prevent further mold growth.
After ensuring that the wall is completely dry, you can now apply new paint to restore the wall’s appearance. If the peeling area was particularly large or the paint was severely damaged, you may need to apply a primer before the fresh coat of paint. Choose a mold-resistant paint to prevent future mold issues, especially in high-humidity areas like bathrooms or basements.
To avoid future mold and peeling paint problems, take steps to maintain proper ventilation in your home. This includes using exhaust fans in bathrooms and kitchens, keeping windows open during dry weather, and ensuring any leaks are repaired promptly. Regularly inspect areas prone to dampness, such as basements, bathrooms, and kitchens, for early signs of moisture buildup.
This solution works because it targets the root causes of mold and peeling walls: moisture and poor ventilation. By using easily accessible, non-toxic ingredients like vinegar and baking soda, you not only save money but also avoid the harmful chemicals that are often found in commercial cleaning products. The key to success with this method is consistent maintenance and addressing the issue as soon as you notice it.
Conclusion
Dealing with mold and peeling walls doesn’t have to be a costly or complicated endeavor. With simple tools, a little effort, and a couple of everyday ingredients, you can restore your walls to their former glory. Remember that prevention is key—keeping your home dry and well-ventilated will go a long way in ensuring that mold and peeling paint don’t become a recurring problem.
So, if you’ve noticed that your walls are looking a bit worse for wear, give this method a try! It’s simple, effective, and can save you a lot of time and money in the long run. Whether you're a homeowner or a renter, this DIY fix is something that any house can do—and it’s free!