For a small area of light surface buildup, this routine may take only a few minutes. More extensive cleaning will naturally require additional time.
The result should be a gasket that is free of loose dirt, cleaning residue, and visible surface buildup.
CHAPTER 3: WHAT IF THE DARK SPOTS DO NOT DISAPPEAR?
One frustrating part of cleaning a refrigerator seal is discovering that some stains remain even after careful washing.
You may wipe the rubber repeatedly, rinse it, and dry it, only to find that faint gray or black marks are still visible.
This does not necessarily mean the cleaning has failed.
There is an important difference between removable surface contamination and permanent discoloration.
Surface mold versus permanent staining
When mold or dirt is sitting on the surface, gentle cleaning may remove much of the visible material.
However, some rubber gaskets develop discoloration over time. Aging, exposure to cleaning chemicals, food pigments, and repeated moisture can alter the appearance of the material.
In some cases, mold may have become established in damaged or porous areas of the rubber. A surface wipe may not reach it completely.
This is why appearance alone cannot always tell you whether a gasket is clean.
If a stain remains after appropriate cleaning, do not automatically assume that stronger chemicals will solve the problem. Repeated exposure to aggressive products can damage the gasket and potentially make it less effective.
Instead, examine the condition of the rubber.
Does it still feel flexible? Are there cracks, tears, or areas where the material has become brittle? Does the refrigerator door close properly? Is there a persistent musty odor?
These questions can help determine whether the problem is simply cosmetic or whether the gasket needs further attention.
Should you use baking soda?
Baking soda is frequently mentioned in household cleaning advice because it can help with certain types of odor and light surface residue.
A small amount mixed with water can form a mild paste. However, it should be used cautiously on refrigerator seals.
If the manufacturer permits it, test the mixture on a small, inconspicuous area first. Avoid aggressive scrubbing, because even relatively mild powders can become abrasive when rubbed repeatedly against soft rubber.
Afterward, wipe the area thoroughly with clean water and dry it completely.
Baking soda should not be treated as a guaranteed mold-killing product. It may help with cleaning, but visible mold growth may require a cleaning or disinfecting product specifically suitable for the surface.
What about vinegar?
White vinegar is another popular household cleaning ingredient.
Its acidity can help remove certain types of residue and may affect some microorganisms under specific conditions. However, vinegar is not a universal disinfectant, and it should not be assumed to eliminate every type of mold or fungal growth.
More importantly, refrigerator manufacturers may have different recommendations for gasket care. Some materials and surrounding finishes may not tolerate certain cleaning products well.
Before using vinegar, check the manufacturer's instructions and test any permitted product on a small area.
Never mix vinegar with bleach or products containing bleach.
Can you use bleach on the rubber seal?
Bleach is sometimes recommended online for mold removal, but it is not automatically the best choice for a refrigerator gasket.
Depending on the product concentration and material, bleach may discolor or damage rubber. It can also create dangerous fumes if mixed with other household chemicals.
If the refrigerator manufacturer specifically permits a bleach-based solution for the gasket, follow the manufacturer's exact dilution and application instructions. Otherwise, choose a compatible cleaning product rather than experimenting with stronger chemicals.
Do not assume that a more powerful chemical will produce a better result.
The objective is to remove contamination while preserving the integrity of the seal.
When replacement may be the better solution
There are situations in which cleaning is no longer enough.
A gasket that is cracked, torn, badly discolored, or permanently deformed may need to be replaced. If mold repeatedly returns from within damaged material, replacement may also be more practical than repeatedly cleaning the same area.
A damaged seal can allow warm air to enter the refrigerator. This may contribute to condensation, temperature fluctuations, and increased energy use.
If the door does not close tightly, the gasket feels unusually stiff, or sections appear detached, consult the refrigerator manufacturer or a qualified appliance technician.
Replacing a damaged gasket can address both the hygiene concern and the refrigerator's ability to maintain a proper seal.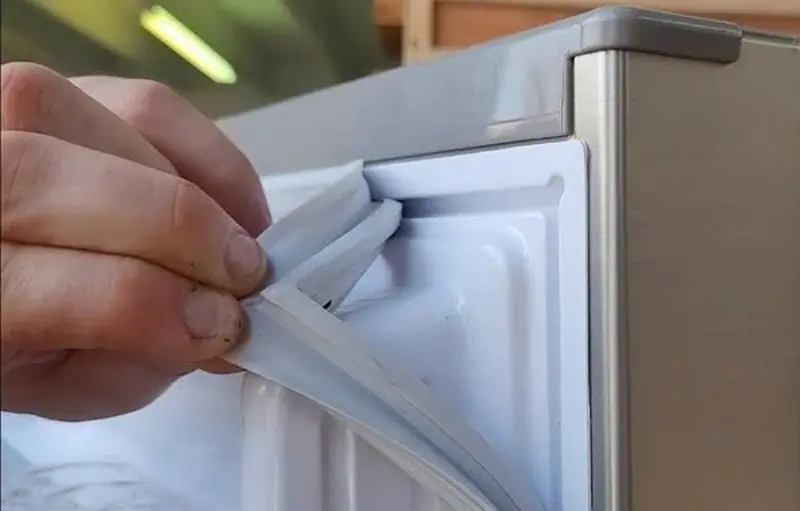
CHAPTER 4: THE CLEANING MISTAKES THAT CAN MAKE THE PROBLEM WORSE
Cleaning a refrigerator gasket seems straightforward, but a few common mistakes can damage the rubber or allow mold to return.
Avoiding these habits can make routine maintenance easier and more effective.
Mistake 1: Cleaning only the visible surface
The most common mistake is wiping the front of the gasket without opening its folds.
Although the visible surface may look clean, moisture and debris can remain hidden inside the narrow channels.
Whenever you clean the refrigerator, take a moment to inspect the entire seal. Gently open the folds and wipe away any accumulated residue.