
 5 hours • Beginner
Cooking, eating, and entertaining turn the kitchen into the hub of the home. When you factor in the time required for putting away groceries, food prep, and cleaning up after each meal, the kitchen is one of the most-used rooms in most houses.
Each of those tasks seem like less of a chore when the space is organized. In fact, an organized kitchen saves you time. Plus, it makes it easier to find supplies and ingredients, which prevents you from buying things you don’t need and keeps food waste to a minimum. However, having an organized kitchen doesn’t mean you have to spend a bunch of money at the Container Store or Ikea. In fact, it doesn’t have to cost a dime.
Step 1 – Take an Inventory
The first step in any organization project is to take everything out where you can see it and take an inventory. Then categorize, keeping groups of pots, cooking utensils, snacks, canned goods, baking supplies, etc. together. This way you can see the amount of space each category needs.
You may need to rethink the layout of your supplies based on this information, moving skillets closer to the stove or relocating cereal to a different area of the pantry, for example.
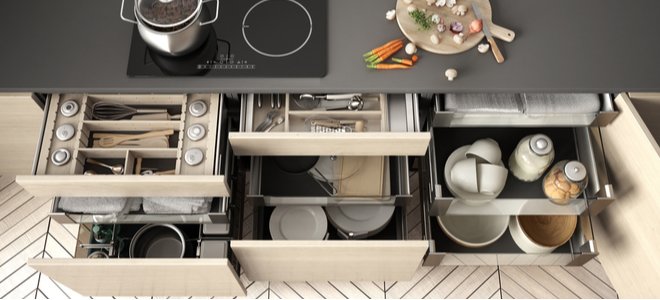
Step 2 – Assess Storage Options
This is where creativity takes over. Skip the urge to rack up costs at Bed, Bath, and Beyond by using what you already have. Cardboard boxes make great storage containers for bags of rice or pasta, baking supplies, the kids’ grab box for school lunches, small utensils, etc. Similarly, baskets, canvas or plastic totes, or wire or metal racks will do the job.
For food itself, look for other items in your kitchen. Grab empty yogurt, salsa, and cottage cheese containers to store small amounts of foods. Glass Mason or Ball jars in every size create ideal storage for nuts, spices, grains, or granola. Keep chip clips on a hook in the pantry to seal up cereal, rice, crackers, trail mix, and any other bags you have open.
Step 3 – Rearrange Shelving
You can create more space in your pantry or cupboard by rearranging the shelves themselves. Start by deciding what you want on the bottom shelf. Say you’re using it for mugs. Measure height using the tallest one and lower the next shelf to that height.
Use the same decision making and measuring calculation for the next shelf, working your way up. The process will provide easy access to the supplies you use the most and will likely open up a wider space at the top for larger items you don’t use very often like the roasting pan, punch bowl, or ice bucket.
Step 4 – Refold the Towels
Improve your drawer space by simply refolding your towels. It’s something you really have to see to believe but efficiently folding towels can reduce two drawers into one or open up half a drawer for other uses.
Try this: Lay your towel flat and fold in each of the longest sides toward the middle, overlapping each one-third section. Then fold the towel lengthwise in half and then in half again. You will then store the towels on their ends. Experiment with variations of this fold, or roll them instead, until you find the optimal fit for your drawer size.

Step 5 – Use Your Height
A big part of having an organized kitchen is using your space effectively. For shelves in cabinets or in the pantry closet, consider the amount of space above items. If this isn’t solved by lowering shelves, use shelf helpers instead.
You can easily DIY shelf risers with three pieces of wood nailed or screwed together to make a three-sided box. Place the open end over mugs, for example, creating a second shelf for more. Another option might be to add cup hooks to the top of space so you can hang cups instead. This technique works for creating two layers in the spice cupboard, stacking canned goods, or making more room for bowls.
Step 6 – Other Helpful Hacks
If you have dangling cords from the slow cooker, toaster, or tablet, reign them in by wrapping the extra length with bread ties.
Place the bottom of an egg carton or an ice tray in the fridge door to hold upside-down condiments. Use totes or boxes on refrigerator shelves to cluster items too.
Use old cereal boxes to store food magazines and put recipes in a three-ring binder.
Also take advantage of the inside of cupboards where you can mount measuring spoons, put recipes on a keychain, or mount a spice or can rack.
Share this article
Source link : https://www.doityourself.com/stry/how-to-organize-your-kitchen-without-spending-money


")


