
Different Green Juices to Reduce Be.lly Fat
Garden 16/12/2025 15:40

Garlic is a wonderful addition to any garden, known for its strong flavor and numerous health benefits. Whether you're a seasoned gardener or a beginner, growing garlic can be an easy and rewarding project. Starting garlic in water is a simple and fun way to give your garlic a head start before transplanting it into the garden. In this guide, we’ll walk you through the process of starting garlic in water and then transitioning it to your garden for a bountiful harvest.
Starting garlic in water is a great way to ensure that your garlic bulbs sprout and begin growing roots before being planted in the garden. It allows you to visually monitor the progress of your garlic, making it easier to choose the healthiest and strongest shoots for transplanting. Additionally, it’s a fun and educational way to get the whole family involved in gardening.
By starting garlic in water, you also create a controlled environment where you can observe the growth of the garlic in its early stages. This method is particularly effective for beginners, as it provides a clear indication of how well your garlic is sprouting.
To start garlic in water, you’ll need the following materials:
Garlic bulbs: Choose a garlic bulb from a local store or your own stock that is healthy and free from disease.
Glass jar or flask: A small, clean jar or glass flask works well to hold the garlic and water.
Toothpicks: These will be used to suspend the garlic bulb above the water.
Water: You’ll need clean, room-temperature water to submerge the garlic.
A warm, sunny location: Garlic needs warmth and light to sprout, so find a location with indirect sunlight or use a grow light.
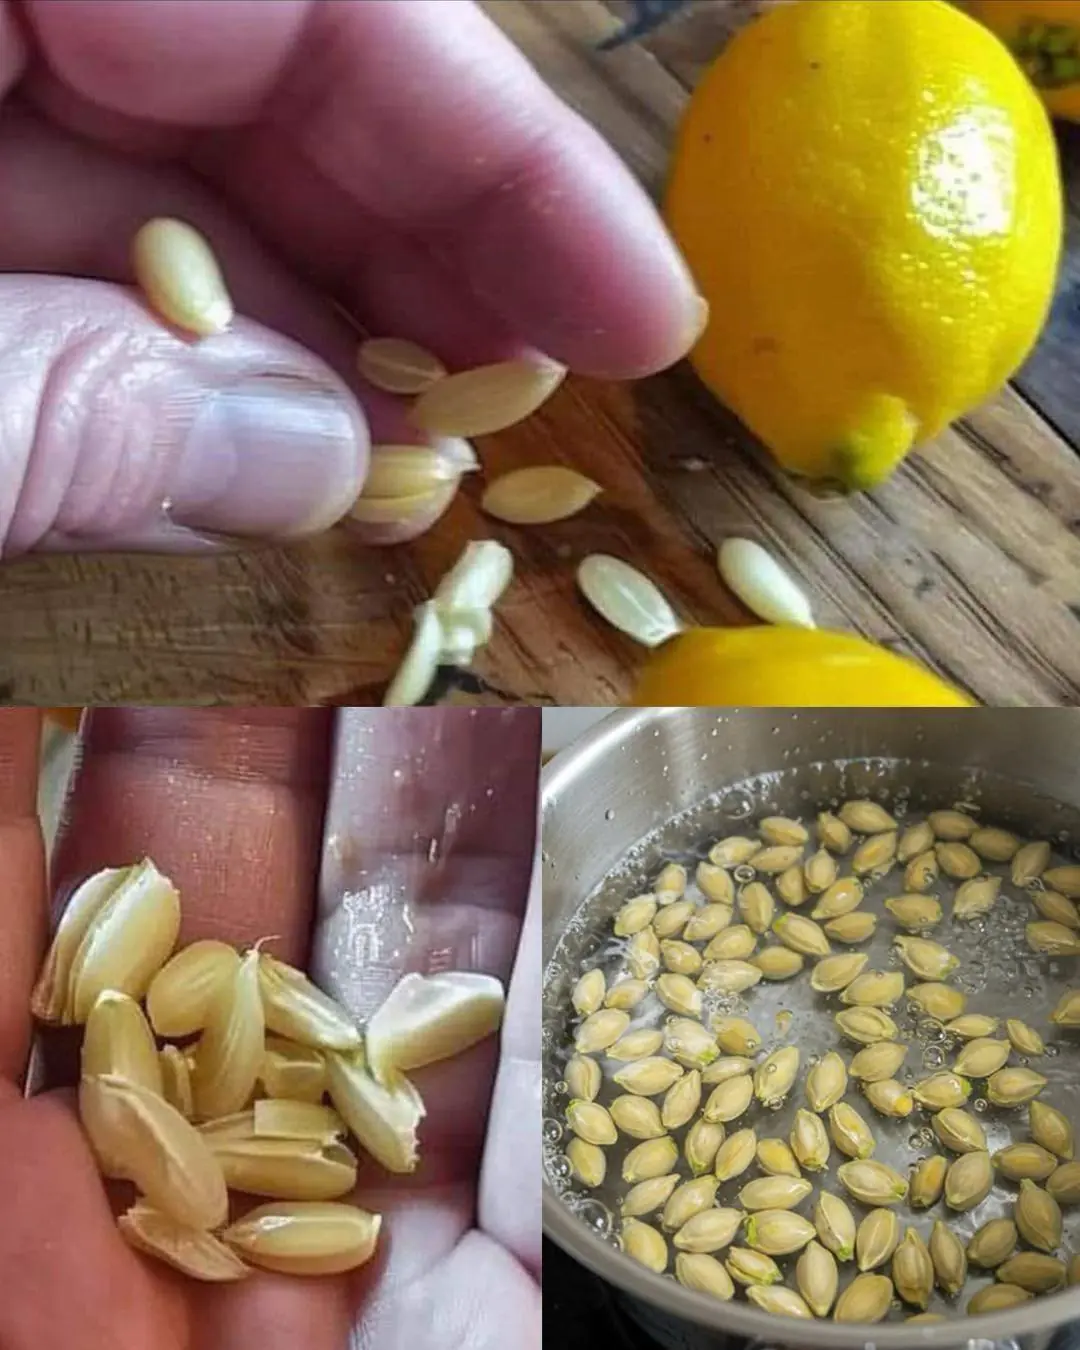
Choose a healthy, organic garlic bulb with cloves that are firm and unblemished. You can use garlic you’ve purchased or a bulb you’ve harvested from your own garden. Look for a bulb that’s fresh, as old garlic will have a lower germination rate.
Gently separate the garlic cloves from the bulb, leaving the skins intact. Choose a few cloves to start with. Make sure to leave the papery skins on the garlic cloves as they will help protect the clove and encourage sprouting.
Fill your glass jar with about an inch or two of clean, room-temperature water. The amount of water will vary based on the size of your jar, but the goal is to cover the base of the garlic cloves without submerging the entire clove.
To keep the garlic clove suspended above the water, insert two or three toothpicks into the sides of each garlic clove. Place the toothpicks across the rim of the jar so that the pointed end of the garlic is submerged in the water while the rest of the clove remains above it. This will ensure the clove receives the moisture it needs while preventing it from being submerged completely.
Set your jar in a warm, sunny spot with indirect sunlight. Garlic cloves need warmth to sprout, so choose a location that’s consistently warm. If you don’t have a sunny windowsill, you can use a grow light to provide the necessary light.
To keep your garlic healthy, change the water every two to three days. This will help prevent bacteria buildup and ensure that the roots develop properly. You’ll begin to see roots forming at the bottom of the garlic cloves within a week or two.
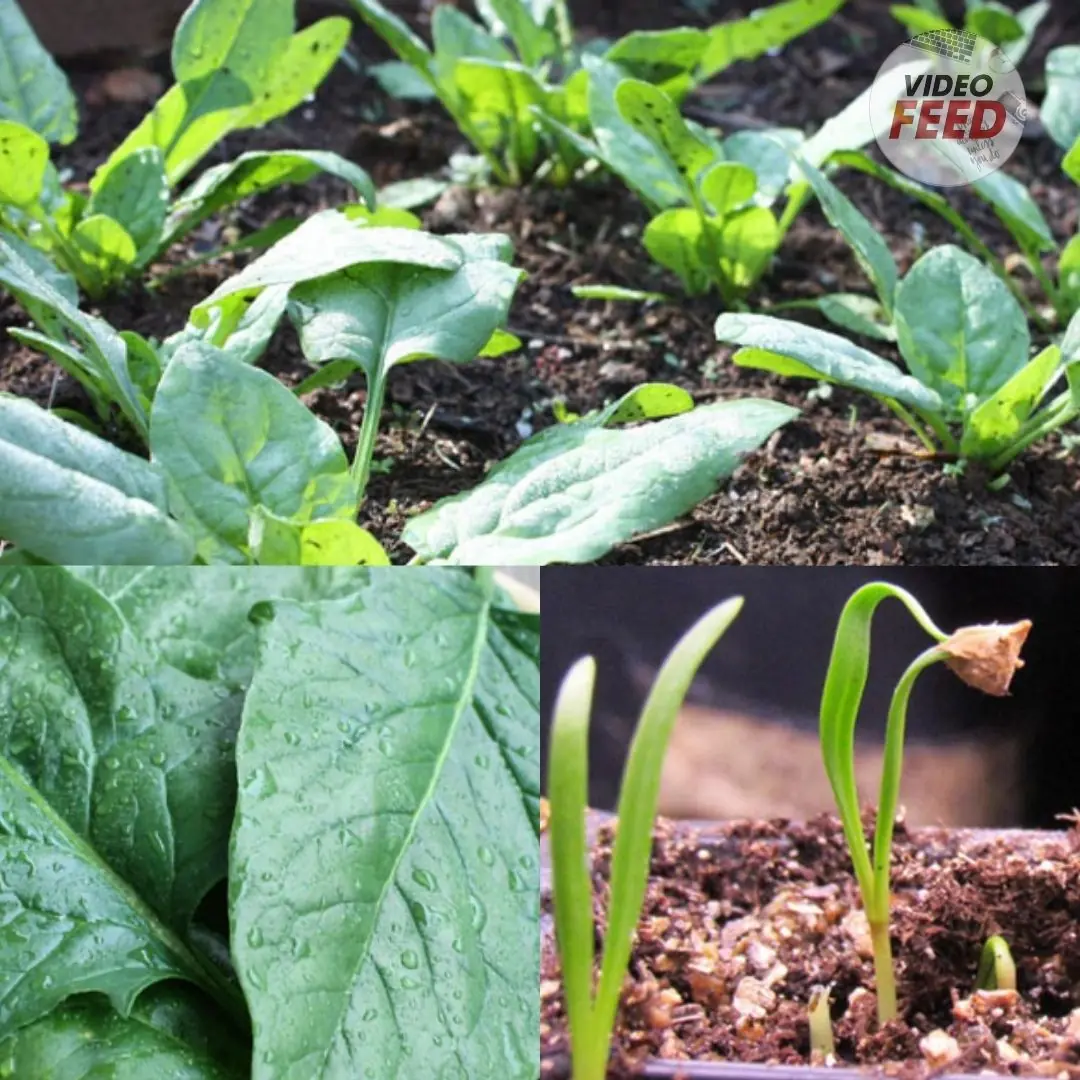
Within 2-3 weeks, you should start to see green shoots emerging from the top of the garlic cloves. These are the garlic sprouts that will eventually grow into garlic plants once they’re transplanted into the garden. Continue to provide indirect sunlight and ensure the garlic is well-watered.
Once your garlic cloves have sprouted and developed healthy roots, it’s time to move them to the garden. Typically, garlic should be planted in the garden in the fall, but you can also transplant it in early spring if the ground is workable. Here’s how to transplant garlic into your garden:
1. Prepare the Garden Bed: Choose a sunny spot in your garden with well-drained soil. Garlic prefers loose, fertile soil, so amend the soil with compost or well-rotted manure if needed.
2. Plant the Garlic Cloves: Plant the sprouted garlic cloves with the roots facing down and the sprout facing up. Space them about 4-6 inches apart in rows. Plant the cloves about 2 inches deep into the soil.
3. Water and Mulch: Water the garlic well after planting, but be sure not to overwater. Add a layer of mulch around the garlic to retain moisture and protect the plants from extreme temperatures.
4. Care for Your Garlic Plants: Garlic requires minimal care once planted. Make sure to water regularly, especially during dry spells. Keep the soil free of weeds, and if necessary, fertilize with a balanced fertilizer.
After several months of growth, your garlic will be ready to harvest. Typically, garlic is ready to be harvested in late spring or early summer, when the leaves start to turn yellow and die back. Gently pull up the garlic plants by the base and allow them to dry in a shaded area for a few weeks before storing.
Starting garlic in water is an easy, fun, and effective way to grow garlic at home. By using this method, you can watch the garlic sprout and develop roots before transferring it to the garden. With a little care and patience, you’ll have your very own homegrown garlic ready for culinary use. Plus, this process is a great way to learn about plant propagation while enjoying the benefits of fresh, homegrown produce.
Happy gardening!


The Amazing Health Benefits of Coconut You Should Know

Doctors reveal the surprising truth about eating red cabbage… See more

What Happens to Your Body When You Sleep with a Fan Running?

Why Do Your Legs Often Feel Numb? Common Causes and Conditions

What Happens When You Put Peppercorns Under Your Bed?

Stop the Pain: 3 Powerful Home Remedies for Canker Sores
Some common foods may contain parasites if poorly handled or cooked.

Kidney Red Flags: Warning Signs Your Body Is Trying to Tell You
One Natural Ingredient That Can Transform Your Skin
Thick ice in your fridge can be removed quickly with this trick.

Peanuts offer nutrients but may affect health in certain cases.

Some morning eating habits may affect long-term stomach health.

4 morning foods to eat on an empty stomach for a healthier gut and better digestion

Drinking Lemon Peel Water Daily: 5 Powerful Health Benefits You Should Know

Effective Ways to Reduce Water Retention Naturally

If your legs cramp at night, you need to know this immediately

No more night cramps — here’s how to avoid them

6 Best Remedies That May Help Keep Your Arteries Healthy and Improve Circulation

8 Early Warning Signs of Ovarian Cancer That Many Women Ignore