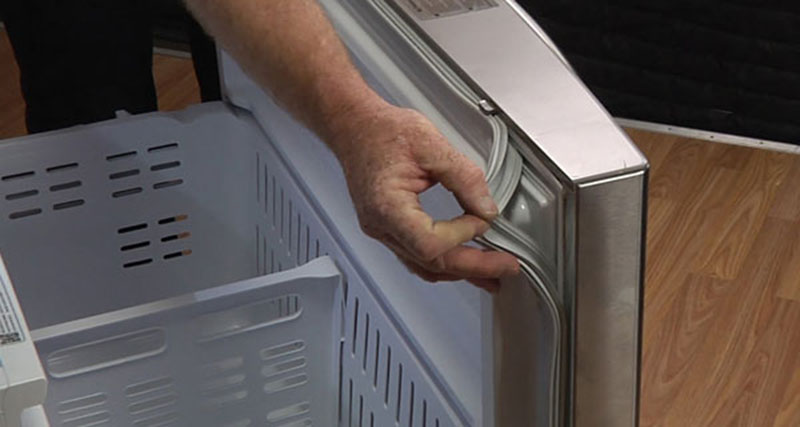
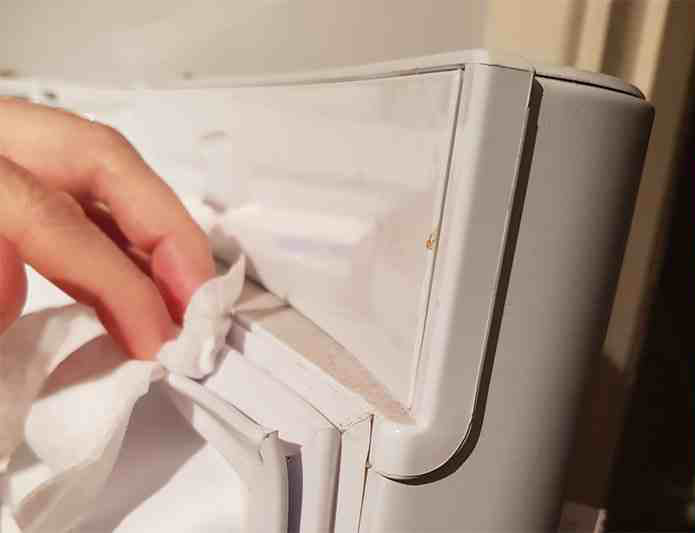
The refrigerator rubber gasket — also called the door seal — is one of the most overlooked parts of the appliance. Yet it plays a critical role in maintaining temperature, preserving food freshness, and preventing energy waste.
Because the gasket is soft, folded, and constantly exposed to moisture, it easily collects:
-
Food residue
-
Dust and grease
-
Condensation
-
Mold and mildew
If not cleaned regularly, it can develop unpleasant odors, harbor bacteria, and even compromise the refrigerator’s ability to seal properly.
Below is a comprehensive guide on how to clean the refrigerator rubber gasket effectively without damaging it.
Why Cleaning the Gasket Matters
The rubber seal ensures an airtight closure. When debris builds up, the door may not close tightly, causing:
-
Cold air leakage
-
Increased electricity consumption
-
Food spoilage
-
Compressor overwork
Additionally, trapped moisture creates an ideal environment for mold growth, especially in humid climates.
Routine maintenance protects both hygiene and appliance efficiency.
What You Will Need
Before starting, gather the following:
-
Warm water
-
Mild dish soap
-
Baking soda (optional)
-
White vinegar (optional)
-
Soft microfiber cloth
-
Old toothbrush or small soft brush
-
Cotton swabs
-
Dry towel
Avoid harsh chemical cleaners, bleach (unless diluted and necessary for heavy mold), or abrasive scrubbers that may damage the rubber.

Step-by-Step Cleaning Process
Step 1: Unplug the Refrigerator (Optional but Recommended)
For safety and energy efficiency, unplugging the refrigerator during deep cleaning is advisable. For quick cleaning, this step may not be necessary, but avoid leaving the door open for too long.
Step 2: Inspect the Gasket
Open the door and gently pull back the folds of the rubber seal. Pay close attention to:
-
Inner creases
-
Corners
-
Bottom sections (where debris often accumulates)
Look for visible mold spots, crumbs, sticky residue, or cracks.
Step 3: Prepare a Mild Cleaning Solution
Mix:
-
Warm water
-
A few drops of mild dish soap
For light cleaning, this is sufficient.
For odor or minor mold, add:
-
1 tablespoon of baking soda to 1 cup of warm water
Baking soda helps neutralize odor and loosen grime.
Step 4: Gently Scrub the Creases
Dip the toothbrush into the solution and carefully scrub inside the folds of the gasket.
Use light pressure. The rubber is flexible but can tear if handled aggressively.
For tight spaces:
-
Use cotton swabs dipped in cleaning solution
This ensures removal of hidden dirt.
Step 5: Remove Mold (If Present)
If you notice mold growth:
Option 1: Vinegar
-
Apply white vinegar directly to the affected area.
-
Let sit for 5–10 minutes.
-
Wipe clean.
Option 2: Diluted Bleach (For Severe Mold Only)
-
Mix 1 part bleach with 10 parts water.
-
Apply carefully with a cloth.
-
Rinse thoroughly afterward.
Always ventilate the area when using bleach and avoid overuse, as it can degrade rubber over time.

Step 6: Wipe and Dry Thoroughly
Use a clean, damp cloth to remove any soap residue.
Then dry completely with a soft towel.
Moisture left behind can promote mold recurrence.
Maintenance Tips to Prevent Future Buildup
-
Wipe the gasket once a week with a damp cloth
-
Avoid spilling liquids that run into the seal
-
Dry the gasket if condensation forms
-
Keep refrigerator temperature properly set to reduce excess moisture
Regular light cleaning prevents heavy scrubbing later.
How to Check If the Gasket Is Still Sealing Properly
After cleaning, test the seal:
-
Close the refrigerator door on a thin piece of paper.
-
Gently pull the paper.
If it slides out easily, the seal may be weakened.
A compromised gasket can cause higher energy bills and inconsistent cooling. In that case, replacement may be necessary.
What to Avoid
-
Do not use sharp objects to scrape dirt
-
Avoid strong solvents or undiluted bleach
-
Do not soak the gasket excessively
-
Avoid abrasive pads that can crack rubber
Protecting the flexibility of the rubber ensures long-term durability.
Final Thoughts
The refrigerator rubber gasket may be small, but it plays a major role in food safety and energy efficiency. Regular cleaning prevents mold growth, maintains proper sealing, and extends the life of your appliance.
A few minutes of maintenance each month can prevent costly repairs and unpleasant odors.
Sometimes the most important maintenance tasks are the ones hidden in plain sight - like the quiet strip of rubber that keeps your refrigerator running efficiently every day.